Adjustable Proportioning Valve Instructions: A Comprehensive Guide
Navigating brake system upgrades requires precision, especially when transitioning to four-wheel discs from drum brakes. This guide details adjusting valves for optimal performance and safety.
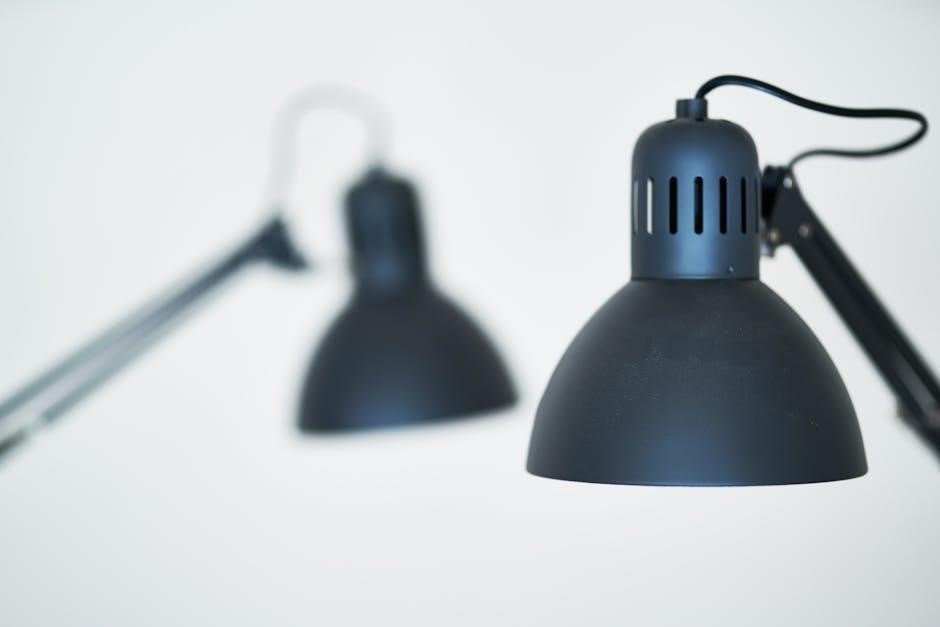
Understanding Proportioning Valves
Proportioning valves are critical components within a vehicle’s braking system, primarily designed to regulate hydraulic pressure distributed to the rear brakes. Their fundamental role is to prevent rear wheel lockup during braking, a dangerous scenario leading to loss of vehicle control. Factory-installed, non-adjustable valves are calibrated for specific vehicle configurations – tires, brake types (drum vs. disc), and weight distribution.
However, modifications like swapping rear drum brakes for discs often render these factory valves ineffective. Drum brakes typically lock up at lower pressures than disc brakes; a non-adjustable valve might restrict rear brake pressure too much, resulting in insufficient stopping power. Adjustable proportioning valves offer a solution, allowing fine-tuning to match the altered braking system characteristics, ensuring balanced and safe braking performance across all four wheels. They are essential for maintaining optimal brake bias.
How Proportioning Valves Work
Proportioning valves operate on a simple yet effective principle: regulating fluid pressure based on hydraulic force. As the driver applies the brakes, hydraulic pressure builds within the system. The valve contains a spring-loaded piston; initially, it allows equal pressure to both front and rear brakes.
However, as rear brake pressure increases – due to the vehicle’s weight transfer during braking – the piston begins to compress against the spring. This compression restricts the flow of fluid to the rear brakes, reducing pressure. The valve’s adjustment allows altering the spring’s tension, thereby changing the pressure at which restriction begins. A higher tension means more pressure is needed to initiate restriction, while lower tension restricts pressure sooner. This precise control prevents rear wheel lockup, maintaining stability and maximizing stopping power.
Why Adjustable Proportioning Valves are Necessary
Factory, non-adjustable proportioning valves are calibrated for specific vehicle configurations – tires, brake types, and weight distribution. When modifications occur, like upgrading to four-wheel disc brakes from rear drums, these valves often become inadequate. Drum brakes lock up at significantly lower pressures than discs, and the original valve may restrict rear braking too much with discs.
An adjustable valve overcomes these limitations. It allows fine-tuning the pressure balance between the front and rear brakes, ensuring optimal performance with altered brake systems. Installing four-wheel discs on a vehicle originally equipped with rear drums, particularly retaining the factory master cylinder, often results in insufficient rear braking without adjustment. The adjustable valve restores proper braking bias, maximizing stopping power and vehicle control, adapting to the new system’s characteristics.
Identifying the Need for Adjustment
Several symptoms indicate a proportioning valve requires adjustment. The most common is rear brake lock-up during moderate braking, suggesting too much pressure is being sent to the rear. Conversely, insufficient rear braking, where the front brakes lock up first or the vehicle feels unbalanced under braking, points to too little rear pressure.
If you’ve recently converted to four-wheel disc brakes, adjustment is almost certainly necessary. The original valve is designed for drum brake characteristics and won’t function optimally with discs. Pay attention to pedal feel; a spongy or overly firm pedal can also indicate an imbalance. A thorough road test, in a safe environment, is crucial to assess braking performance and identify any discrepancies. Observe the vehicle’s tendency to pull to one side during braking – this can also signal an imbalance requiring adjustment.

Installation of an Adjustable Proportioning Valve
Installing an adjustable proportioning valve involves carefully removing the existing unit and replacing it with the new valve. Begin by safely securing the vehicle and disconnecting the negative battery terminal. Completely remove the original proportioning valve, ensuring all brake lines are properly capped to prevent fluid loss.
The new adjustable valve is then connected using appropriate fittings. Commonly, you’ll encounter 3/8-24 and 2 7/16-24 inverted flare fittings. Utilize adapters if necessary to match your existing brake line connections. Ensure all connections are tightened securely to prevent leaks, but avoid over-tightening, which can damage the fittings. Double-check all lines for kinks or obstructions before proceeding. Bleed the brake system thoroughly after installation to remove any air introduced during the process.
Removing the Existing Proportioning Valve
Before commencing removal, prioritize safety by securing the vehicle and disconnecting the battery’s negative terminal. Locate the existing proportioning valve, typically found within the brake line system near the master cylinder or along the frame rail. Carefully loosen the brake line fittings connected to the valve, using a flare nut wrench to prevent rounding.

Have a container ready to catch any escaping brake fluid, as disconnecting the lines will inevitably release some. Once the lines are detached, completely remove the old valve, noting its orientation for reference during the new valve installation. Inspect the removed valve for any signs of internal damage or corrosion that may have contributed to brake system issues. Properly dispose of the old valve and any contaminated brake fluid.
Connecting Brake Lines – Fitting Sizes (3/8-24 & 2 7/16-24)
Accurate brake line connection is crucial for a safe and functional system. The adjustable proportioning valve often requires adapting between different fitting sizes. Commonly, you’ll encounter 3/8-24 and 2 7/16-24 inverted flare fittings. Utilize appropriate adapters, such as those with golden finishes (2 7/16-24 Male to 3/8-24 Female), to bridge the gap between the valve’s ports and your existing brake lines.

Ensure all fittings are properly tightened using a flare nut wrench to avoid damage and leaks. Silver fittings, often supplied with the valve, are typically designed for 3/16 brake line connections. Double-check compatibility before tightening. Apply thread sealant specifically designed for brake lines to prevent leaks. Carefully route the brake lines, avoiding kinks or sharp bends, and securely mount them to prevent chafing.
Valve Placement Options
Flexibility in placement allows adaptation to various vehicle configurations. While typically installed adjacent to the master cylinder for easy access, several alternative locations are viable. Consider mounting the adjustable proportioning valve under the dash for a discreet installation, or inside the seat riser if space is limited.
More unconventional, yet functional, spots include within the rocker panel, offering protection from the elements, and inside the transmission tunnel, providing a central location. The key is accessibility for future adjustments and ensuring the valve is protected from excessive heat or physical damage. Regardless of the chosen location, secure mounting is paramount to prevent vibration and potential brake line stress. Prioritize a clean, organized installation for ease of maintenance.
Near the Master Cylinder
Positioning the adjustable proportioning valve close to the master cylinder offers significant advantages. This location simplifies installation and allows for quick, convenient adjustments as needed. Accessibility is key, enabling easy fine-tuning of brake bias during testing and track events. Short brake line runs minimize potential pressure loss and improve responsiveness.

However, consider potential heat transfer from the master cylinder, which could affect valve performance. Proper insulation or shielding may be necessary. Ensure sufficient space exists for comfortable wrench access and avoid obstructing other vital components. Mounting the valve securely to a solid point near the master cylinder is crucial to prevent vibration and maintain accurate adjustments. This placement is often favored for its practicality and ease of use.
Under the Dash
Installing an adjustable proportioning valve under the dash presents a discreet and protected location, shielding it from direct environmental elements and potential damage. This placement keeps the valve within the vehicle’s cabin, offering a degree of security and simplifying access for adjustments. However, space constraints under the dash can be a significant challenge, requiring careful planning and potentially some modification to existing components.
Ensure the valve is mounted securely to prevent rattling or interference with pedals or steering components. Routing brake lines through the firewall may require additional effort and proper sealing to avoid leaks. Accessibility for adjustments might be limited, so consider extending the adjustment knob or using a remote adjustment mechanism. Prioritize a location that avoids excessive heat from the engine or exhaust system, as this could impact valve performance and longevity.
Inside the Seat Riser
Positioning the adjustable proportioning valve inside the seat riser offers a concealed and relatively accessible location, often providing ample space without significantly impacting the vehicle’s interior layout. This placement shields the valve from direct exposure to the elements and potential road debris, enhancing its longevity and reliability. However, access for adjustments may be somewhat restricted depending on the seat’s design and adjustability.
Carefully consider the valve’s proximity to the seat’s moving parts to prevent interference during seat adjustments. Secure mounting is crucial to avoid rattling or vibration, which could affect valve performance. Routing brake lines within the seat riser requires careful planning to ensure they are protected from abrasion and pinching. Ensure sufficient clearance from the seat frame and any other components to prevent heat transfer from the cabin or exhaust system.
Within the Rocker Panel
Installing an adjustable proportioning valve within the rocker panel presents a discreet mounting option, keeping it hidden from view and potentially protected from external damage. However, this location demands careful consideration due to the confined space and potential exposure to moisture and road salt. Thoroughly inspect the rocker panel for existing holes or openings that can be utilized for brake line routing, minimizing the need for drilling.
Ensure adequate ventilation to prevent heat buildup, especially if the valve is positioned near the exhaust system. Securely mount the valve to a solid section of the rocker panel, utilizing appropriate brackets and fasteners to withstand vibrations and impacts. Protect brake lines from sharp edges and potential pinch points within the rocker panel. Accessibility for future adjustments may be limited, so plan accordingly before finalizing the installation.
Inside the Transmission Tunnel
Positioning the adjustable proportioning valve inside the transmission tunnel offers a centralized and relatively protected location, shielded from direct road exposure and potential impacts. However, this area is often crowded with other components like the driveshaft, shifter linkage, and wiring harnesses, requiring careful planning and space assessment. Heat generated by the exhaust system is a significant concern; ensure ample clearance and consider heat shielding to prevent valve malfunction.
Accessibility for adjustments can be challenging, potentially requiring partial disassembly of the center console. Secure mounting is crucial, utilizing existing tunnel structure or fabricated brackets to withstand vehicle vibrations. Route brake lines carefully, avoiding contact with moving parts or hot surfaces. Prioritize a location that allows for easy inspection and maintenance, despite the confined space.
Adjusting the Valve for Optimal Braking
Achieving balanced braking performance with an adjustable proportioning valve demands a systematic approach. The goal is to prevent rear wheel lockup during hard braking while maximizing stopping power. Begin by understanding that drum brakes typically require lower pressure than disc brakes to reach maximum effectiveness; a non-adjustable valve often activates below 400 psi.
Initial adjustments should be conservative, prioritizing safety. Gradually increase rear brake pressure, monitoring for signs of lockup during controlled stops. A slight bias towards the front brakes is generally preferred. Remember, proper adjustment depends on your specific vehicle setup – master cylinder size, brake type (disc vs. drum), and tire characteristics all play a role. Precise tuning requires patience and careful observation during testing.
Initial Adjustment Procedure
Before hitting the road, a preliminary adjustment of the proportioning valve is crucial. Start with the valve fully closed, effectively minimizing rear brake pressure. This ensures a safe baseline for testing. Slowly open the valve, typically in quarter-turn increments, while monitoring brake feel during low-speed stops.
Focus on achieving a firm, consistent pedal feel without any noticeable rear wheel lockup. It’s vital to perform these initial adjustments in a controlled environment, like an empty parking lot. Avoid aggressive braking during this phase. Utilize the supplied fittings – 3/8-24 and 2 7/16-24 – to ensure secure brake line connections. Remember, the ideal setting will vary based on your vehicle’s configuration and brake system components.
Testing and Fine-Tuning
Following the initial adjustment, rigorous testing is paramount to dial in optimal braking performance. Gradually increase speed during controlled stops, paying close attention to the brake pedal feel and vehicle stability. Look for any signs of rear wheel lockup, which indicates excessive rear brake pressure. If lockup occurs, slightly close the proportioning valve to reduce rear bias.
Conversely, if the front brakes are locking up first, or you experience a spongy pedal, incrementally open the valve to increase rear brake contribution. Repeat this process of small adjustments and testing until a balanced and responsive brake feel is achieved. Remember to test under various conditions, including both dry and wet pavement, to ensure consistent performance. Prioritize safety throughout the fine-tuning process.

Adjusting for Disc vs. Drum Brake Systems
The core reason for adjustable proportioning valves arises when converting from drum to disc brakes. Factory, non-adjustable valves are calibrated for drum brake characteristics – they lock up at lower pressures (around 400 psi). Disc brakes require significantly higher pressure to reach their locking point.
When upgrading to discs with a factory valve, rear braking can be severely diminished. An adjustable valve allows you to increase rear brake pressure to match the discs’ capabilities. Start with the valve nearly closed, then gradually open it during testing. Monitor for rear lockup; if it occurs, reduce pressure. The goal is to achieve balanced braking where the rear brakes contribute effectively without overpowering the front;
Troubleshooting Common Issues
Two primary issues arise when adjusting proportioning valves: rear brake lock-up and insufficient rear braking. Lock-up indicates too much pressure is being sent to the rear brakes; slowly close the valve to reduce this pressure until the wheels stop locking during firm braking. Conversely, insufficient rear braking suggests too little pressure.
Gradually open the valve, testing frequently. Ensure brake lines aren’t kinked or blocked. If problems persist, double-check the master cylinder output and the valve’s internal mechanism. Proper adjustment requires a careful balance; prioritize safety and controlled testing. Remember, a correctly adjusted valve maximizes stopping power and vehicle stability.
Rear Brake Lock-Up
Rear brake lock-up signifies excessive hydraulic pressure reaching the rear brakes, causing them to seize before the front. This is a dangerous situation, leading to loss of steering control. The primary solution is to reduce the pressure delivered to the rear circuit via the adjustable proportioning valve.
Begin by slowly closing the valve – turning it clockwise – in small increments. After each adjustment, perform a controlled braking test in a safe environment. Monitor for wheel lock-up during firm braking. Continue adjusting until the rear wheels remain compliant and do not lock before the front. Ensure the brake lines aren’t damaged or kinked, as this can mimic lock-up symptoms. Prioritize safety during testing.

Insufficient Rear Braking
Insufficient rear braking manifests as a long stopping distance or a feeling of the front brakes doing most of the work. This is common after upgrading to disc brakes, as they require less pressure than drums to achieve the same stopping power. The factory proportioning valve may restrict flow too much, hindering rear brake performance.
To rectify this, gradually increase the pressure to the rear brakes by opening the adjustable proportioning valve – turning it counter-clockwise – in small increments. After each adjustment, conduct controlled braking tests in a secure location. Assess if rear brake contribution has improved, ensuring balanced braking force. If the original system had drum brakes, more adjustment may be needed. Remember, a properly adjusted valve provides optimal balance and stopping power.
Safety Precautions
Brake system modifications are critical for vehicle safety; proceed with extreme caution. Always disconnect the negative battery terminal before commencing any work on the brake system to prevent accidental activation. Use jack stands to securely support the vehicle – never rely solely on a jack. Brake fluid is corrosive; wear eye protection and gloves, and clean up spills immediately.
Thoroughly bleed the brake system after installation and adjustment to remove any air bubbles. Perform initial testing in a controlled environment, away from traffic. Verify proper function before driving on public roads. Incorrect adjustment can lead to brake failure or loss of control. If unsure, consult a qualified mechanic. Prioritize safety throughout the entire process, and double-check all connections.
Tools Required for Installation and Adjustment
Successful installation and adjustment necessitate a specific toolkit. Essential tools include a flare nut wrench set (3/8-24 and 2 7/16-24 sizes are crucial for brake line fittings), a line wrench set to prevent rounding off nuts, and a brake line flaring tool for any necessary line modifications. A ratchet set with various sockets and extensions is also vital, alongside an adjustable wrench for general tightening.
Bleeding the brakes requires a brake bleeder kit or a helper for traditional manual bleeding. A pressure bleeder can simplify this process. Additionally, a screwdriver set, pliers, and safety glasses are necessary; Having a torque wrench ensures proper tightening of fittings. Finally, a container for collecting old brake fluid and shop towels for cleanup are highly recommended for a clean and safe workspace.
Compatibility Considerations
Ensuring compatibility is paramount for a safe and effective brake system. Adjustable proportioning valves are most beneficial when upgrading from rear drum to disc brakes, as factory valves are calibrated for drum brake characteristics. When using a factory master cylinder with four-wheel discs, an adjustable valve becomes almost essential to achieve proper rear brake bias.
Consider the brake line fitting sizes – commonly 3/8-24 and 2 7/16-24 inverted flare. Verify the valve’s inlet and outlet port sizes match your brake lines or have appropriate adapters available. The valve must be compatible with your brake fluid type. Finally, assess your vehicle’s overall braking system design; some systems may require additional modifications alongside the valve installation for optimal performance and safety.