Husqvarna Sewing Machine Instruction Manual: A Comprehensive Guide
Discover detailed guides for Husqvarna Viking sewing machines, including the 1140 model, alongside serger manuals like the Huskylock 700, offering extensive support.
Husqvarna sewing machines boast a rich heritage of innovation and quality, evolving from producing high-quality tools to becoming a leading name in the home sewing industry. These machines, particularly those under the Husqvarna Viking brand, are renowned for their durability, advanced features, and user-friendly design.
Whether you’re a beginner or an experienced seamstress, understanding your Husqvarna machine is key to unlocking its full potential. This guide aims to provide a comprehensive overview, covering everything from basic operations to advanced techniques. Accessing the correct manual – whether for a classic model or a modern serger like the Huskylock 700 – is the first step. Resources are readily available online, including official websites and supportive communities, ensuring a seamless sewing experience;
Understanding Husqvarna Viking Models
Husqvarna Viking offers a diverse range of sewing machine models, each tailored to specific needs and skill levels. From mechanical machines ideal for beginners to computerized models packed with advanced features, there’s a Viking machine for every sewist. Identifying your specific model is crucial for accessing the correct instruction manual and support resources.
Models like the 1140 represent a blend of functionality and ease of use, while sergers, such as the Huskylock 700, expand creative possibilities with professional-grade finishing techniques. Understanding the unique capabilities of your machine – whether it’s decorative stitching, buttonhole creation, or serger threading – will significantly enhance your sewing projects. Online forums and the official Husqvarna Viking website provide valuable insights into various models and their functionalities.
Locating Your Specific Model’s Manual
Finding the correct instruction manual for your Husqvarna Viking sewing machine is paramount for optimal use and maintenance. The Husqvarna Viking official website serves as the primary resource, often providing downloadable manuals in PDF format. Alternatively, searching online using your specific model number (e.g., Husqvarna Viking 1140) will yield relevant results.
For older or discontinued models, exploring online forums and communities dedicated to Husqvarna Viking machines can be beneficial, as users frequently share scanned copies of manuals. Service manuals, offering in-depth technical information, are also available online, though they may require a more focused search. Remember to verify the manual’s compatibility with your exact model to ensure accurate guidance.
Essential Components & Their Functions
Explore the core elements of your Husqvarna machine – from the needle and presser foot system to thread guides – understanding each function is key.
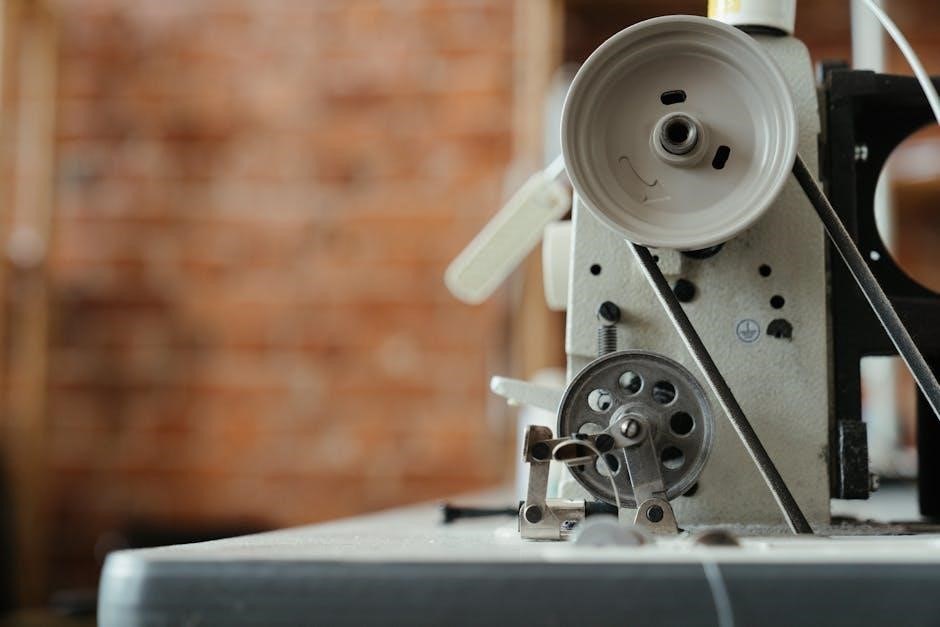
Needle and Presser Foot System
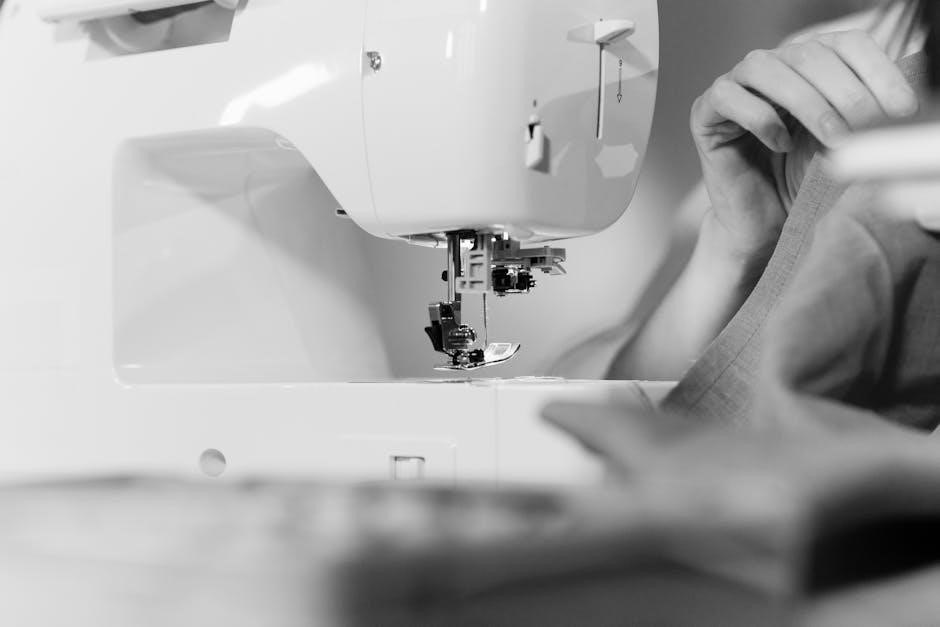
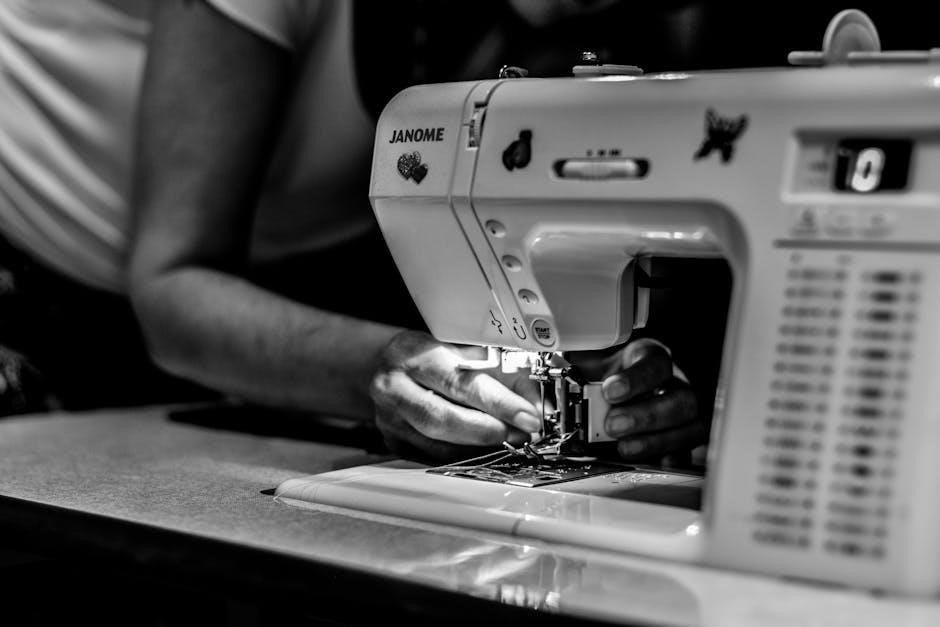
The needle and presser foot system are fundamental to successful sewing with your Husqvarna Viking machine. Understanding their interplay ensures optimal fabric feeding and stitch formation. Different needles are designed for various fabric types – universal, ballpoint, stretch, and even leather needles exist, each impacting stitch quality.
Presser feet are equally crucial, with specialized options available for zippers, buttonholes, quilting, and decorative stitching. Correct presser foot selection prevents skipped stitches and fabric damage. Proper needle insertion is vital; ensure it’s fully inserted and facing the correct direction. Regularly inspect your needle for bends or damage, replacing it as needed. Maintaining the correct presser foot pressure, adjusted via the tension dial, guarantees even fabric handling throughout your sewing projects.
Bobbin Winding and Insertion
Proper bobbin winding is essential for consistent stitch quality on your Husqvarna Viking sewing machine. Begin by placing the thread spool on the spool pin and guiding the thread through the designated tension disc. Follow the machine’s diagram to correctly wind the bobbin, ensuring even distribution.
Bobbin insertion varies slightly by model, but generally involves placing the bobbin into the bobbin case and threading the thread through the tension spring. Ensure the thread flows smoothly without obstruction. An incorrectly inserted bobbin can cause tangled threads and skipped stitches. Always use the correct type of bobbin recommended for your machine to avoid damage and maintain optimal performance. Regular checks ensure a smooth sewing experience.
Thread Guides and Tension Control
Understanding thread guides is crucial for proper stitch formation. Husqvarna Viking machines utilize a series of guides to ensure consistent thread flow from the spool to the needle. Always follow the threading path illustrated in your machine’s manual precisely. Incorrect threading can lead to tension issues and poor stitch quality.
Tension control directly impacts stitch balance. Adjust the upper tension dial to match the thread type and fabric weight. Too much tension results in puckering, while too little causes looping. Test stitches on scrap fabric to fine-tune the tension. Maintaining correct tension ensures even, professional-looking seams. Regularly check and adjust as needed for optimal results.
Stitch Selection and Adjustment
Husqvarna Viking machines offer a diverse range of stitches, from basic straight and zigzag to decorative options. Utilize the stitch selection dial or electronic interface to choose your desired stitch. Refer to your manual for stitch charts and recommended uses.
Adjusting stitch length and width allows for customization. Longer stitch lengths are suitable for heavier fabrics, while shorter lengths are ideal for delicate materials. Zigzag width controls the side-to-side movement of the needle. Experiment with different settings on scrap fabric to achieve the desired effect. Precise adjustments ensure optimal stitch quality and fabric compatibility.
Basic Sewing Operations
Master fundamental techniques like threading, bobbin winding, and straight/zigzag stitching to unlock your Husqvarna machine’s potential for various sewing projects.
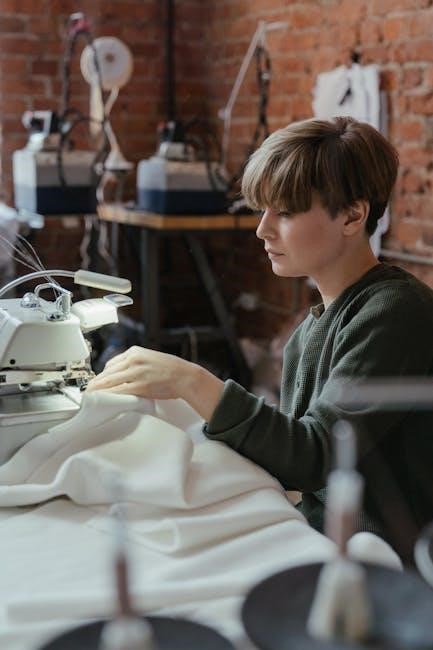
Threading the Machine
Proper threading is crucial for optimal sewing performance with your Husqvarna Viking machine. Begin by ensuring the machine is turned off and the presser foot is raised. Follow the numbered threading path illustrated in your specific model’s manual – these paths vary slightly between machines. Generally, you’ll guide the thread from the spool pin, through tension discs, and down to the needle.
Pay close attention to any thread guides or take-up levers along the way, ensuring the thread seats correctly in each component. Incorrect threading can lead to skipped stitches or thread breakage. Always use the correct type of thread recommended for your fabric. Finally, thread the needle from front to back, using the needle threader if needed. A correctly threaded machine is the first step to successful sewing!
Winding the Bobbin
Consistent bobbin winding is essential for even stitch formation. First, place the spool of thread on the spool pin and guide the thread through the designated bobbin winding tension disc. Next, attach the empty bobbin to the bobbin winder spindle, ensuring it clicks into place securely.
Engage the bobbin winder by pushing it to the right (consult your manual for the exact mechanism). Press the foot pedal gently to start the winding process. Most Husqvarna Viking machines will automatically stop when the bobbin is full. Once complete, disengage the bobbin winder and remove the full bobbin. Properly wound bobbins contribute significantly to the quality of your sewing projects.
Straight Stitching Techniques
Mastering the straight stitch is fundamental to sewing. Begin by selecting the straight stitch setting on your Husqvarna Viking machine. Adjust the stitch length according to your fabric and project needs – shorter for delicate fabrics, longer for heavier materials.
Guide the fabric smoothly under the presser foot, keeping the edge aligned with the desired seam allowance markings on the needle plate. Maintain a consistent speed and avoid pulling or pushing the fabric. A steady hand and proper fabric guidance are key to achieving a neat, even straight stitch. Practice on scrap fabric to refine your technique before starting your project.
Zigzag Stitching Applications
The zigzag stitch offers versatility beyond basic seams. Utilize it to finish raw edges, preventing fabric fraying and creating a professional look. Adjust the stitch width and length to suit the fabric type and desired finish – a narrower width for lightweight fabrics, a wider width for more substantial edges.
Explore decorative applications; zigzag stitches can create textured designs and embellishments. Employ it for stretch fabrics, allowing the seam to stretch with the material. It’s also ideal for attaching elastic or lace, providing a secure and flexible bond. Experiment with different settings to unlock the full creative potential of your Husqvarna Viking machine’s zigzag function.
Advanced Features & Techniques
Unlock your Husqvarna Viking’s potential with decorative stitches, buttonhole creation, zipper insertion, and free-motion quilting for enhanced sewing projects.
Decorative Stitching Options
Husqvarna Viking sewing machines boast a wide array of decorative stitches, extending far beyond basic functionality. These stitches allow for personalized embellishments on various projects, from garments to home décor. Explore the stitch charts within your specific model’s manual to discover the diverse patterns available – floral motifs, geometric designs, and even unique character stitches are often included.
Experiment with different stitch widths and lengths to alter the appearance of each design. Utilize contrasting thread colors for a bolder effect, or opt for subtle tonal variations for a more refined look. Consider combining decorative stitches with appliqué techniques to create truly one-of-a-kind pieces. Remember to test stitches on scrap fabric before applying them to your final project to ensure desired results and prevent potential issues.
Buttonhole Creation
Husqvarna Viking machines simplify buttonhole creation with automated features, though understanding the process is key. Begin by selecting the appropriate buttonhole foot for your model. Consult your manual for specific foot attachment instructions. Next, measure the button you’ll be using to determine the correct buttonhole size; most machines offer adjustable settings.
Follow the machine’s guided steps – typically involving placing the button at the back of the foot and lowering it. The machine will then automatically stitch around the button, creating a perfectly sized buttonhole. Practice on scrap fabric first to refine your technique. Ensure consistent fabric feeding for clean edges. Finally, carefully cut open the buttonhole without damaging the stitching.
Zipper Insertion Guide
Successfully inserting a zipper requires precision. Begin by selecting the appropriate zipper foot for your Husqvarna Viking machine – a specialized foot designed to sew close to the zipper teeth. Pin the zipper tape to the fabric, ensuring the zipper is slightly open. Lower the presser foot and carefully stitch along the zipper tape, staying consistent with your seam allowance.
Repeat on the opposite side of the zipper. For centered zippers, mark the center point and align the zipper accordingly. Utilize the machine’s built-in zipper stitch options for a professional finish. Practice on scrap fabric to master the technique before working on your final project. Slow and steady stitching is crucial for avoiding puckering or uneven seams.
Free Motion Quilting
Unlock creative possibilities with free motion quilting on your Husqvarna Viking! First, detach the presser foot shank and attach the free motion quilting foot (also known as a darning foot). Lower the feed dogs – this allows you to move the fabric freely under the needle. Set your machine to ‘free motion’ or ‘darning’ stitch setting.
Gently move the fabric with both hands, guiding it in the desired pattern while simultaneously controlling the stitch length with the foot pedal. Practice smooth, consistent movements on a practice quilt sandwich. Experiment with different thread colors and quilting designs. Remember, consistent speed and gentle guidance are key to achieving beautiful free motion quilting results.
Maintenance and Troubleshooting
Ensure optimal performance by regularly cleaning your Husqvarna machine and addressing common issues like thread breakage or skipped stitches promptly and effectively.
Cleaning Your Husqvarna Machine
Regular cleaning is crucial for maintaining your Husqvarna sewing machine’s performance and longevity. Dust, lint, and stray threads accumulate during use, hindering smooth operation and potentially causing malfunctions. Begin by disconnecting the power supply. Use a soft brush – often included with your machine – to remove loose debris from the bobbin area, feed dogs, and around the needle plate.
For more stubborn lint, a vacuum cleaner with a brush attachment can be helpful, but use caution to avoid damaging delicate parts. A slightly dampened (not wet!) cloth can wipe down the exterior surfaces. Avoid harsh chemicals or abrasive cleaners, as these can damage the finish. Pay particular attention to oiling points, ensuring they are clean before re-lubrication. Consistent cleaning prevents issues and keeps your machine running smoothly for years to come.
Oil Points and Lubrication
Proper lubrication ensures the smooth operation of your Husqvarna sewing machine. Refer to your specific model’s manual for designated oiling points – typically found in the bobbin area, around the shuttle hook, and along moving linkages. Use only sewing machine oil; other lubricants can cause build-up and damage.
Apply oil sparingly, using a needle-nose oiler for precision. Wipe away any excess oil to prevent staining fabric. Regular oiling frequency depends on usage; heavier use requires more frequent lubrication. Combine oiling with cleaning, ensuring oil points are free of debris before application. Consistent lubrication minimizes friction, reduces wear and tear, and extends the life of your machine, maintaining optimal performance.
Troubleshooting Common Issues (Thread Breakage)
Frequent thread breakage can stem from several causes. First, re-thread the machine, ensuring the thread is properly seated in all guides and the tension discs. Check the needle – a bent or dull needle is a common culprit; replace it with a new, appropriate size for your fabric.
Verify correct thread tension; too-tight tension increases breakage risk. Ensure the bobbin is wound evenly and inserted correctly. Also, incompatible thread types or poor-quality thread can cause issues. Finally, confirm the presser foot pressure is adjusted correctly for the fabric weight. Systematically addressing these points will usually resolve thread breakage problems.
Troubleshooting Common Issues (Skipped Stitches)
Skipped stitches often indicate a problem with the needle or its installation. Begin by ensuring the needle is correctly inserted – it should be fully pushed up into the needle clamp. A bent, damaged, or dull needle must be replaced immediately with one of the correct type and size for your fabric.
Check the thread path for obstructions and confirm proper threading. Incorrect thread tension can also cause skipped stitches; adjust accordingly. Verify the presser foot is engaged and applying sufficient pressure. Finally, ensure you’re using the correct needle plate for your chosen stitch. Addressing these areas systematically will often resolve skipped stitch issues.
Husqvarna Viking Huskylock Serger Integration
Explore the synergy between Husqvarna Viking sewing machines and Huskylock sergers, notably the 700 model, for enhanced sewing and finishing capabilities.
Understanding Serger Functionality
Sergers, like the Husqvarna Viking Huskylock, represent a significant advancement beyond traditional sewing machines. They simultaneously cut fabric, overlock the edge to prevent fraying, and stitch a seam – all in one efficient step. This makes them invaluable for garment construction, especially knit fabrics, and creating professional-looking finishes.
Unlike a sewing machine that uses two threads, sergers typically employ three, four, or even five threads, resulting in a more durable and flexible seam. Understanding thread paths and tension adjustments is crucial for optimal serger performance. Different stitch types, such as rolled hems and flatlock seams, expand creative possibilities. Mastering serger functionality unlocks faster project completion and a higher quality of finished products, complementing the capabilities of your Husqvarna Viking sewing machine.
Huskylock 700 Model Specifics
The Husqvarna Viking Huskylock 700 is a versatile serger designed for both beginners and experienced sewists. This model boasts automatic thread tension, simplifying the setup process and ensuring consistent stitch quality. It features a 7mm stitch width, providing ample coverage for various fabric types and seam finishes.
Key features include an automatic needle threader, saving time and reducing eye strain, and a differential feed system for preventing puckering on stretchy fabrics. The Huskylock 700 also offers adjustable stitch length and a built-in rolled hem capability. Accessing the comprehensive user manual is essential for understanding its specific settings and maximizing its potential, complementing your existing Husqvarna Viking sewing machine expertise.
Serger Threading and Tension
Proper threading is crucial for optimal serger performance, particularly with the Huskylock 700. Follow the color-coded threading path meticulously, ensuring each thread is securely seated in its respective tension disc. Automatic thread tension simplifies this process, but initial setup requires careful attention to the manual’s diagrams.
Adjusting tension is key to achieving balanced stitches. Incorrect tension leads to looping or puckering. Test sew on scrap fabric and adjust the tension dials incrementally until a balanced stitch is achieved. Remember that different thread types and fabric weights necessitate tension adjustments. Consistent practice and referencing the manual will build confidence in achieving professional-looking serged seams.
Resources and Support
Access the official Husqvarna Viking website, online forums, and service manuals for comprehensive assistance with your sewing machine and serger needs.
Husqvarna Viking Official Website
The Husqvarna Viking official website serves as the primary hub for all your sewing machine and serger support needs. Here, you’ll find a wealth of resources, including downloadable instruction manuals for a vast range of models, from classic sewing machines to the advanced Huskylock sergers like the 700.
Beyond manuals, the website offers troubleshooting guides, frequently asked questions, and helpful tips to maximize your sewing experience. You can also register your machine for warranty information and access exclusive content. The site provides details on local dealers, allowing you to find service and support in your area. Furthermore, explore creative inspiration, project ideas, and software updates to enhance your Husqvarna Viking machine’s capabilities. It’s a complete resource for both beginners and experienced sewists.
Online Forums and Communities
Engage with a vibrant community of Husqvarna Viking sewing enthusiasts through dedicated online forums and communities. These platforms offer a collaborative space to ask questions, share projects, and troubleshoot issues related to your sewing machine or serger.
Experienced users often provide valuable insights and solutions, supplementing the official instruction manuals. You can find discussions on specific models, like the 1140 or the Huskylock 700, as well as general sewing techniques and tips. These communities are excellent for learning advanced features, discovering creative applications, and receiving peer support. Many forums also host downloadable resources, including user-created guides and stitch patterns, expanding your knowledge beyond the official documentation.
Service Manual Access
For in-depth technical information and detailed repair procedures, accessing the Husqvarna Viking service manual is crucial. These manuals, often more comprehensive than standard user guides, provide exploded diagrams, parts lists, and step-by-step instructions for servicing your machine.
While not always freely available, service manuals can be located through online resources or obtained directly from Husqvarna Viking authorized service centers. They are particularly valuable for experienced users or technicians undertaking complex repairs. Information suggests manuals exist for various models, including those related to sergers like the Huskylock series. Having access to a service manual empowers you to diagnose and resolve issues efficiently, extending the lifespan of your sewing investment.