Dometic RV Air Conditioner Manual: A Comprehensive Guide
Navigating maintenance, troubleshooting, and operation of your Dometic RV air conditioner is crucial for comfortable travels and extended unit lifespan.
Understanding Your Dometic RV Air Conditioner
Dometic RV air conditioners are designed to provide efficient and reliable cooling for recreational vehicles, ensuring a comfortable environment during various climates. These systems differ from residential units due to the demands of mobile use, including vibration resistance and energy efficiency. Understanding the core components – the compressor, condenser, evaporator, and fan – is fundamental. The compressor circulates refrigerant, the condenser releases heat, the evaporator absorbs heat, and the fan distributes cooled air.
Proper airflow is vital; obstructions can significantly reduce performance. Dometic units often feature multiple fan speeds and cooling modes to optimize comfort and energy consumption. Familiarizing yourself with these features, alongside the thermostat controls, allows for personalized climate management. Regular maintenance, including filter cleaning and coil inspection, is essential for optimal operation and longevity. Ignoring these aspects can lead to reduced cooling capacity and potential system failures.
Model Identification and Specifications
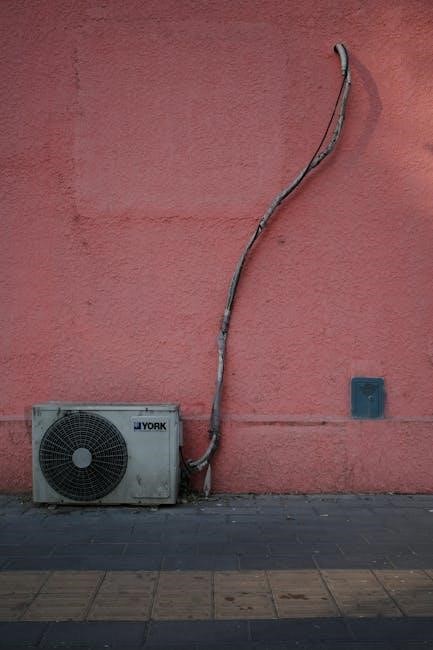
Accurate model identification is the first step for accessing specific documentation and parts. Dometic RV air conditioner model numbers are typically found on a label affixed to the unit’s housing, often located on the side or underside. These numbers denote the unit’s cooling capacity (measured in BTUs – British Thermal Units), voltage requirements (typically 120V or 240V), and specific features.
Common specifications include cooling capacity ranging from 6,000 to 15,000 BTU, power consumption varying from 800 to 1800 watts, and dimensions that dictate roof opening size. Weight is also a crucial factor for RV roof load considerations. Understanding these specifications ensures compatibility with your RV’s electrical system and roof structure. Refer to the Dometic website or your owner’s manual for a detailed breakdown of your specific model’s features and performance characteristics.
Safety Precautions and Warnings
Prioritizing safety during installation, operation, and maintenance is paramount. Always disconnect the RV’s power supply before performing any work on the air conditioner. Working with electricity poses a significant risk of shock or electrocution. Ensure the roof structure can adequately support the unit’s weight to prevent collapse.
Never operate the air conditioner with a damaged power cord or if it exhibits unusual noises or smells. Avoid obstructing the airflow around the unit, as this can lead to overheating and potential fire hazards. Regularly inspect the condensate drain for blockages to prevent water damage. Do not attempt to repair the unit yourself if you are not qualified; contact a certified technician for assistance. Ignoring these warnings could result in personal injury or property damage.

Installation and Setup
Proper installation demands careful roof preparation, secure mounting, and correct electrical connections for optimal performance and longevity of the Dometic unit.
Proper RV Roof Preparation
Before commencing installation, a thorough roof inspection is paramount; Ensure the RV roof surface is clean, dry, and free from debris, including leaves, branches, and accumulated dirt. Any existing sealant around roof fixtures should be carefully removed and the area cleaned with a suitable solvent, following the manufacturer’s instructions.
Inspect the roof for any signs of damage, such as cracks, punctures, or soft spots. Address these issues before proceeding, as they can compromise the structural integrity of the installation. Reinforce the area if necessary, consulting with an RV repair professional for guidance. Verify the roof’s load-bearing capacity to ensure it can support the weight of the air conditioner unit.
Finally, mark the intended mounting location, ensuring adequate clearance around vents, skylights, and other roof features. A properly prepared roof is fundamental to a secure and leak-free installation, maximizing the lifespan and efficiency of your Dometic RV air conditioner.
Mounting the Air Conditioner Unit
Carefully position the Dometic air conditioner unit onto the prepared roof surface, aligning it with the previously marked location. Ensure the unit sits flush against the roof, and that all mounting points are properly aligned with the underlying RV structure. Apply a generous bead of RV-specific sealant around the base of the unit, following the manufacturer’s recommendations for sealant type and application.
Secure the unit using the appropriate mounting hardware, typically self-tapping screws designed for RV roofs. Tighten the screws gradually and evenly, avoiding over-tightening which could damage the roof or the unit itself. Double-check that all screws are securely fastened and that the unit is firmly attached to the roof.
Inspect the sealant around the perimeter of the unit, ensuring a complete and watertight seal. Remove any excess sealant and allow it to cure fully before proceeding with electrical connections.
Electrical Connections and Wiring
Before commencing any electrical work, disconnect the RV’s power supply at the breaker panel to prevent electrical shock. Identify the appropriate wiring for the air conditioner, typically a dedicated circuit with the correct voltage and amperage rating. Connect the wiring according to the Dometic wiring diagram, ensuring proper polarity – black to hot, white to neutral, and green or bare copper to ground.
Use appropriately sized wire connectors and ensure all connections are secure and insulated. Avoid loose connections or exposed wires, which can create a fire hazard. Carefully route the wiring to avoid pinching or abrasion, and secure it with clamps or ties.
Double-check all connections before restoring power, and verify proper operation of the air conditioner.

Operation and Control
Understanding the control panel, fan speeds, cooling modes, and thermostat adjustments ensures optimal performance and personalized comfort within your recreational vehicle.
Powering On and Off
Initiating your Dometic RV air conditioner is generally straightforward, but understanding the power source is paramount. Ensure your RV is connected to a reliable power supply – either shore power (a campground pedestal) or a generator. Locate the main power switch for the air conditioner, often situated near the unit itself or on a central control panel within the RV.
Flip this switch to the ‘on’ position. Subsequently, use the air conditioner’s control panel (or remote, if equipped) to activate the unit. A ‘power’ or ‘on/off’ button will initiate the cooling process. To power down, simply reverse this process: press the ‘off’ button on the control panel and then switch off the main power switch. Always ensure the unit is completely powered off when not in use to conserve energy and prevent potential electrical issues.
Fan Speed Settings
Dometic RV air conditioners typically offer multiple fan speed settings, allowing you to customize airflow and noise levels. These settings are usually controlled via the air conditioner’s control panel or remote control. Common options include ‘low,’ ‘medium,’ and ‘high’ fan speeds. The ‘low’ setting provides gentle airflow, ideal for quiet operation and maintaining a consistent temperature without strong drafts.
‘Medium’ offers a balance between airflow and noise, suitable for general cooling. ‘High’ delivers maximum airflow for rapid cooling, but may be louder. Some models also feature an ‘auto’ fan speed, which automatically adjusts based on the temperature. Experiment with different settings to find the optimal comfort level for your needs.
Cooling Mode Operation
To activate cooling mode on your Dometic RV air conditioner, ensure the unit is powered on and select the ‘cool’ setting on the control panel or remote. The compressor will then begin to cycle, actively removing heat from the RV’s interior. Adjust the desired temperature using the thermostat controls; the unit will work to maintain this setpoint;
Effective cooling relies on proper airflow – keep vents unobstructed. Some models offer ‘fast cool’ or ‘turbo’ modes for quicker temperature reduction, consuming more energy. Monitor the unit’s performance and adjust fan speed for optimal comfort. Remember that external factors like direct sunlight and ambient temperature impact cooling efficiency.
Thermostat Adjustment and Temperature Control
Your Dometic RV air conditioner’s thermostat allows precise temperature regulation. Digital models feature clear displays and push-button controls for setting your desired comfort level. Rotate the dial or use the up/down arrows to select the target temperature, typically ranging from 60°F to 80°F (15°C to 27°C).
The unit will cycle on and off to maintain the set temperature. Avoid drastic temperature settings, as this can strain the compressor. Consider using the ‘auto’ mode, which automatically adjusts fan speed based on temperature difference. Regularly check the thermostat’s accuracy and calibrate if necessary. Proper thermostat use maximizes efficiency and comfort within your RV.

Maintenance and Troubleshooting
Regular cleaning of filters and coils, alongside condensate drain checks, ensures optimal performance and addresses common issues like reduced cooling or unit noise.
Filter Cleaning and Replacement
Maintaining a clean air filter is paramount for efficient cooling and air quality within your RV. Dometic recommends checking the filter monthly, and cleaning or replacing it as needed, especially during periods of heavy use or dusty conditions.
To clean a reusable filter, gently vacuum loose debris, then wash with mild soap and water. Ensure the filter is completely dry before reinstalling to prevent mold growth. Disposable filters should be replaced entirely.
A clogged filter restricts airflow, forcing the air conditioner to work harder, reducing cooling capacity, and potentially leading to component failure. Regularly scheduled filter maintenance extends the life of your Dometic unit and optimizes its performance. Refer to your specific model’s documentation for filter type and replacement intervals.
Coil Cleaning Procedures
The evaporator and condenser coils are vital for heat exchange, and require periodic cleaning to maintain optimal performance. Dirty coils reduce efficiency and cooling capacity. Dometic recommends annual coil cleaning, or more frequently in dusty environments.
Before cleaning, disconnect power to the air conditioner. Use a soft brush or vacuum with a brush attachment to remove loose debris. Apply a commercially available coil cleaner specifically designed for HVAC systems, following the product’s instructions carefully.
Rinse the coils gently with water, avoiding high pressure that could damage the fins. Ensure the unit is completely dry before restoring power. Clean coils improve airflow, reduce energy consumption, and prolong the lifespan of your Dometic RV air conditioner.
Checking and Maintaining Condensate Drain
Proper condensate drainage is essential to prevent water damage and maintain cooling efficiency. A clogged drain line can lead to water leaks inside your RV and reduced performance of the air conditioner. Dometic recommends checking the condensate drain regularly, especially during periods of high humidity.
Locate the condensate drain outlet, typically a small tube extending from the unit. Inspect for any obstructions, such as algae, dust, or debris. You can use a flexible wire or pipe cleaner to gently clear any blockages.
Periodically flush the drain line with a mild bleach solution (1 part bleach to 10 parts water) to prevent future buildup. Ensure thorough rinsing with clean water afterward. A clear drain line ensures efficient moisture removal and protects your RV from water damage.
Common Issues and Solutions (No Cooling)
If your Dometic RV air conditioner isn’t cooling, several factors could be at play. First, verify the unit is receiving power and the thermostat is set correctly. A tripped breaker or blown fuse is a common cause; check your RV’s electrical panel.
Next, inspect the air filter – a dirty filter restricts airflow, hindering cooling. Replace or clean it as needed. Frozen evaporator coils can also prevent cooling; turn off the unit and allow it to thaw.
Low refrigerant levels are less common but require professional attention. If these steps don’t resolve the issue, consult a qualified RV technician for diagnosis and repair.
Common Issues and Solutions (Unit Noise)
Unusual noises from your Dometic RV air conditioner can indicate several problems. Rattling sounds often stem from loose screws or debris within the unit or ductwork; inspect and tighten accordingly. A humming noise might suggest a failing capacitor or motor, requiring professional evaluation.
Whistling sounds could indicate restricted airflow, possibly due to a dirty air filter or blocked vents. Cleaning or replacing the filter and ensuring clear vents can resolve this.
If the noise is a loud banging, immediately turn off the unit and seek professional assistance, as it could signify a serious mechanical issue. Regular maintenance can minimize noise and extend the unit’s life.
Common Issues and Solutions (Electrical Problems)
Electrical issues with your Dometic RV air conditioner require careful attention and often professional help. If the unit doesn’t power on, first check the RV’s circuit breaker and the air conditioner’s dedicated breaker. A tripped breaker is a common cause.
Verify the voltage at the air conditioner using a multimeter; low voltage can prevent operation. Blown fuses within the unit itself should also be inspected and replaced with the correct amperage rating.
If the unit runs intermittently or displays error codes, a faulty control board or wiring connection may be the culprit. Never attempt electrical repairs without proper knowledge and safety precautions; consult a qualified technician.

Advanced Features and Settings
Explore digital control panel functions, sleep mode for energy savings, and convenient remote control operation to personalize your cooling experience effectively.
Digital Control Panel Functions
The Dometic RV air conditioner’s digital control panel offers intuitive operation and precise control over your comfort. This panel typically displays current temperature settings, fan speeds, and selected modes – cooling, fan only, or auto. Utilize the up and down arrow buttons to adjust the desired temperature with accuracy. The ‘Mode’ button cycles through the available operating options, allowing you to tailor the system to your specific needs.
Many models feature a ‘Sleep’ function, optimizing energy consumption during nighttime hours. Explore the panel’s settings to discover programmable timers for automated operation. Some advanced units include diagnostic codes displayed in case of malfunctions, aiding in troubleshooting. Familiarize yourself with the panel’s layout and functions to maximize efficiency and enjoy a consistently comfortable RV environment. Refer to your specific model’s documentation for detailed instructions and feature explanations.
Sleep Mode and Energy Saving Options
Dometic RV air conditioners prioritize energy efficiency, offering features like ‘Sleep Mode’ to minimize power consumption during rest. Sleep Mode gradually increases the temperature setting overnight, providing comfortable sleep while reducing energy usage. This function is ideal for extending battery life when boondocking or conserving power at campgrounds.
Beyond Sleep Mode, consider utilizing the fan-only setting during milder weather to circulate air without intensive cooling. Regularly cleaning air filters ensures optimal airflow, reducing strain on the unit and improving efficiency. Some models incorporate smart thermostats with programmable schedules, allowing you to pre-set temperature adjustments based on your daily routine. By leveraging these energy-saving options, you can enjoy a comfortable RV experience while minimizing your environmental impact and operational costs.
Remote Control Operation
Dometic RV air conditioners often include a convenient remote control for effortless operation from anywhere within the RV. The remote typically mirrors all functions available on the main control panel, allowing adjustments to fan speed, cooling mode, and temperature settings without needing to access the unit directly.
Ensure the remote has fresh batteries for optimal performance. Most remotes feature a clear display showing the current settings. Utilize the ‘Auto’ function for automated temperature control. Some advanced remotes offer programmable timers and sleep modes for enhanced convenience and energy savings. Keep the remote in a safe, accessible location to avoid misplacement. Familiarize yourself with the remote’s button layout for quick and easy adjustments during your travels, maximizing comfort and control.

Parts and Accessories
Genuine Dometic replacement filters, air distribution boxes, and detailed wiring diagrams are essential for maintaining optimal performance and longevity of your system.
Replacement Filters
Maintaining optimal air quality and cooling efficiency within your Dometic RV air conditioner heavily relies on regularly replacing the air filters. These filters capture dust, pollen, and other airborne particles, preventing them from circulating throughout your RV and potentially damaging the unit’s internal components.
Dometic offers a variety of replacement filters designed specifically for their RV air conditioner models. It’s crucial to select the correct filter size and type to ensure a proper fit and effective filtration. Filters are typically made from washable or disposable materials, with disposable filters requiring periodic replacement – generally every 30 to 90 days depending on usage and environmental conditions.
Washable filters can be cleaned with mild soap and water, thoroughly rinsed, and allowed to dry completely before reinstallation. Regularly checking and replacing or cleaning your filters will not only improve air quality but also contribute to the overall performance and longevity of your Dometic RV air conditioner.
Air Distribution Boxes and Vents
Effective air distribution is paramount for consistent cooling throughout your RV. Dometic RV air conditioners utilize air distribution boxes and a network of vents to channel cooled air from the main unit to various areas within the recreational vehicle. These components work in tandem to ensure even temperature regulation and eliminate hot or cold spots.
Regularly inspect the vents for obstructions like dust buildup or closed dampers, which can restrict airflow. Air distribution boxes often feature adjustable louvers allowing you to direct airflow precisely where it’s needed most. Ensuring these louvers are properly positioned maximizes cooling efficiency.
Properly maintained distribution systems contribute significantly to the overall comfort and performance of your Dometic air conditioning system. Inspecting and cleaning these components periodically will help maintain optimal airflow and cooling capacity throughout your RV.

Wiring Diagrams and Schematics
Understanding the electrical system of your Dometic RV air conditioner is vital for safe and effective troubleshooting or repair. Detailed wiring diagrams and schematics illustrate the connections between the air conditioner unit, the RV’s power supply, the control panel, and other related components. These diagrams are essential for identifying potential electrical faults and performing necessary repairs.
Always disconnect the power supply before attempting any electrical work. Diagrams typically depict wire colors, terminal locations, and component identification. Referencing these schematics ensures correct wiring during installation or replacement of parts.
Dometic provides specific wiring diagrams for each air conditioner model; consult your unit’s documentation or the Dometic support website for the appropriate schematic. Incorrect wiring can lead to system malfunction or pose a safety hazard.

Warranty Information and Support
Dometic provides warranty coverage for its RV air conditioners, and customer support is readily available for assistance with any issues or inquiries.
Dometic Warranty Coverage
Dometic stands behind the quality of its RV air conditioners, offering comprehensive warranty protection to ensure customer satisfaction and peace of mind. The standard warranty typically covers defects in materials and workmanship for a specified period, often one year from the original date of purchase.
This coverage extends to components like the compressor, fan motors, and control systems. However, the warranty doesn’t usually cover damage resulting from improper installation, misuse, neglect, accidents, or normal wear and tear. It’s essential to register your product promptly after purchase to activate the warranty.
Extended warranty options may also be available for purchase, providing additional years of coverage. Keep your proof of purchase and warranty documentation readily accessible for any potential claims. Detailed warranty terms and conditions can be found in the product manual or on the official Dometic website.
Contacting Dometic Customer Support
Should you encounter any issues with your Dometic RV air conditioner, or require assistance with installation, operation, or warranty claims, Dometic provides multiple avenues for customer support. Their official website, dometic.com, features a comprehensive FAQ section, troubleshooting guides, and downloadable manuals.
You can also reach Dometic’s customer service team via phone during business hours; specific contact numbers vary by region and are listed on their website. Email support is another option, allowing you to submit detailed inquiries and receive personalized assistance.
Dometic also maintains an active presence on social media platforms, offering a channel for quick questions and updates. When contacting support, have your model number and purchase date readily available to expedite the process.