Timex Radio Clock Manual: A Comprehensive Guide
This manual provides detailed instructions for your Timex radio-controlled clock, covering setup, synchronization, features, troubleshooting, and care – ensuring optimal performance and enjoyment.
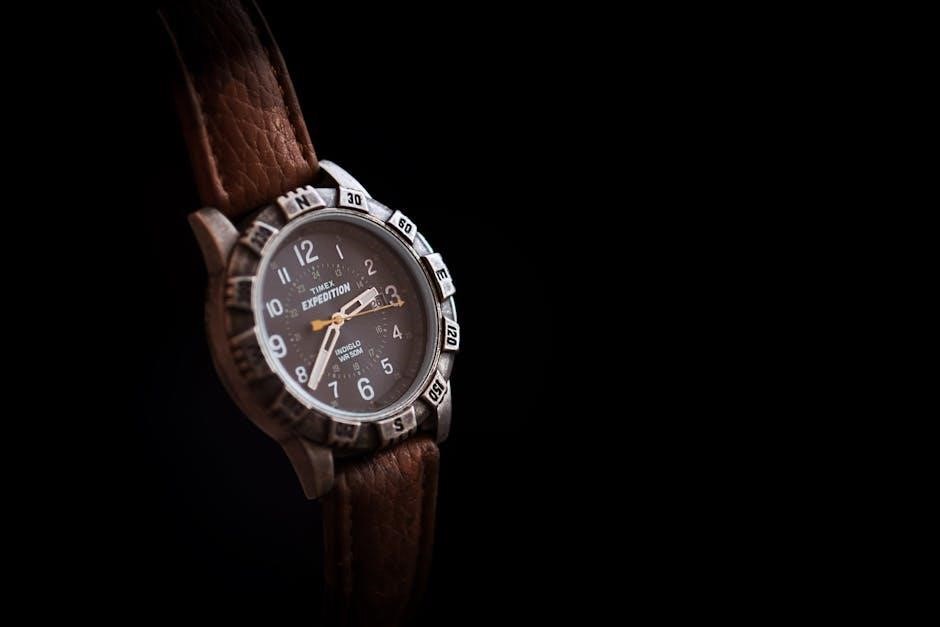
Timex radio clocks represent a fusion of traditional watchmaking and cutting-edge technology, offering unparalleled accuracy and convenience. These innovative timepieces automatically synchronize with official atomic clock signals, ensuring precise timekeeping without manual adjustments. Unlike standard quartz clocks, Timex radio clocks minimize drift and maintain accuracy within seconds per month.
This technology eliminates the need for daylight saving time adjustments in many regions. Timex has become a trusted name in timekeeping, and their radio-controlled clocks continue this legacy by providing reliable and user-friendly operation. This guide will help you unlock the full potential of your Timex radio clock.
What is a Radio-Controlled Watch?
Radio-controlled watches, also known as atomic watches, receive time signals broadcast by atomic clocks. These highly accurate clocks, maintained in national standards laboratories, provide a consistent and precise time reference. Transmitters relay this information via radio waves, which compatible watches can receive and synchronize with.
This synchronization process typically occurs overnight, ensuring accurate timekeeping. The signal strength and reception depend on location and environmental factors. Radio-controlled watches offer significant advantages over traditional timepieces, eliminating the need for manual setting and providing exceptional accuracy, often within a second per year.
Why Choose a Timex Radio Clock?
Timex radio clocks combine reliability with cutting-edge technology, offering unparalleled accuracy and convenience. Unlike standard clocks, they automatically synchronize with official time signals, eliminating manual adjustments and ensuring you’re always on time. Timex’s commitment to quality ensures durable construction and user-friendly operation.
These clocks are ideal for those who value precision and appreciate a hassle-free experience. Beyond accurate timekeeping, many Timex radio clocks feature additional functionalities like alarms, calendars, and easy-to-read displays, making them a practical and stylish addition to any home or office.

Understanding Your Timex Radio Clock
This section details the clock’s components, button layout, and initial setup procedures, enabling users to quickly grasp its functionality and begin accurate timekeeping.
Key Features and Functions
Timex radio clocks boast automatic time synchronization, receiving signals from atomic clocks for exceptional accuracy, eliminating manual adjustments. Many models include a user-friendly chronograph for precise timing of events, alongside multiple alarm settings for varied schedules.
World time functionality allows tracking of different time zones, ideal for travelers or international communication. Backlight illumination ensures readability in low-light conditions, while a durable build and water resistance enhance longevity. These clocks often feature a calendar display and adjustable display contrast for personalized viewing. The radio-controlled technology ensures consistent, reliable timekeeping, making them a convenient and accurate timekeeping solution.
Display Overview and Button Functions
The display typically showcases the time, date, and alarm status, often with indicators for radio signal reception and battery level. Buttons control various functions: ‘Mode’ cycles through display options, ‘Set’ adjusts settings, and ‘Light’ activates the backlight.
Dedicated buttons manage alarms and the chronograph. Some models feature buttons for world time selection or contrast adjustment. Understanding each button’s function is crucial for navigating the clock’s features. Refer to the diagram in this manual for precise button locations and their corresponding actions, ensuring effortless operation and customization of your Timex radio clock.
Initial Setup and Time Synchronization
Upon first use, insert the battery and allow the clock to automatically synchronize with the atomic time server. This process may take several minutes, indicated by a radio wave icon. Ensure the clock is near a window for optimal signal reception.
If automatic synchronization fails, initiate manual synchronization via the ‘Set’ or ‘Mode’ button, as detailed in the manual. Confirm your location settings are correct for accurate time zone reception. Successful synchronization is vital for maintaining precise timekeeping, eliminating the need for manual adjustments and ensuring reliable accuracy.
Time Synchronization Details
Radio time synchronization utilizes atomic clock signals for accuracy; automatic and manual options are available, with troubleshooting steps for signal reception issues.
How Radio Time Synchronization Works
Timex radio clocks receive time signals from national atomic clock transmitters, ensuring exceptional accuracy. These signals transmit a precise time code, which your clock decodes and sets itself accordingly. The process involves the clock searching for these signals – typically at night – and automatically synchronizing when a strong signal is detected.
Factors like location, building construction, and interference can affect signal reception. The clock usually attempts synchronization daily, but manual synchronization is also possible. Successful synchronization is indicated by a specific icon on the display, confirming the clock is receiving and utilizing the atomic time signal for precise timekeeping.
Automatic vs. Manual Time Synchronization
Automatic synchronization is the default setting, allowing your Timex radio clock to seek and receive the time signal nightly, ensuring continuous accuracy without user intervention. However, if the clock fails to synchronize automatically – due to location or interference – manual synchronization becomes necessary.
Manual synchronization initiates the search for the time signal immediately upon user request, often through a dedicated button press. This is useful after moving the clock to a new location or if prolonged signal loss occurs. Both methods aim for the same precise time, offering flexibility and control over timekeeping.
Troubleshooting Synchronization Issues
If your Timex radio clock doesn’t synchronize, first ensure a clear, unobstructed location away from metal objects and electronic interference. Try moving the clock closer to a window. If issues persist, perform a manual synchronization attempt; this forces a signal search. Check the signal strength indicator (if available) for reception quality.
Low batteries can also hinder synchronization; replace them with fresh ones. In areas with weak signals, synchronization may only occur during nighttime hours. If problems continue, consult the Timex support website for further assistance and specific troubleshooting steps related to your model.
Using the Alarm Function
This section details setting, activating, and deactivating the alarm on your Timex clock, including snooze functionality and, if applicable, multiple alarm options.
Setting the Alarm
To set the alarm, typically you’ll press and hold the ‘Alarm Set’ button until the hour digits flash. Use the ‘Hour’ and ‘Minute’ buttons to adjust the desired alarm time. Some models require cycling through AM/PM settings; ensure this is correct. Once the time is set, press the ‘Alarm Set’ button again to confirm.
Verify the alarm icon is displayed on the screen, indicating it’s active. Certain Timex radio clocks allow for multiple alarms, requiring you to select the desired alarm slot before setting the time. Refer to your specific model’s instructions for detailed steps, as button layouts and functions can vary slightly.
Alarm On/Off and Snooze Function
Activating or deactivating the alarm is usually done by pressing the ‘Alarm’ button. A displayed alarm icon confirms it’s enabled; its absence indicates it’s off. When the alarm sounds, pressing any button (except the light button on some models) typically activates the snooze function.
Snooze duration is often preset, usually around nine minutes, but some Timex clocks allow customization. Repeatedly pressing a button will cycle through snooze intervals. To completely stop the alarm, you may need to press and hold the ‘Alarm’ button or a designated ‘Stop’ button, depending on your specific model.
Multiple Alarm Settings (If Applicable)
Certain Timex radio clocks offer the convenience of multiple alarm settings, allowing you to program different wake-up times for various days or purposes. Accessing these settings usually involves repeatedly pressing the ‘Alarm’ button to cycle through available alarm slots (Alarm 1, Alarm 2, etc.).
Each alarm can be independently configured with its own time and alarm type (daily, weekdays, weekends, or one-time). The display will often indicate which alarm slot is currently being edited. Refer to your specific model’s instructions for detailed steps on setting and managing multiple alarms effectively.

Chronograph Functionality
The chronograph, or stopwatch, feature allows precise timing of events; start, stop, reset functions are key, and lap time recording enhances its utility.
Starting, Stopping, and Resetting the Chronograph
To initiate the chronograph, typically press the designated “Start/Stop” button once; the seconds hand (or digital display) will begin counting elapsed time. Pressing the same button again will pause the timing, effectively “stopping” the chronograph. The display will then hold the recorded time.
For lap time recording, a separate “Lap” button is often present. Pressing it while the chronograph is running records a split time without halting the overall timer. To completely reset the chronograph and return it to zero, press the “Reset” button – this clears both the elapsed time and any recorded lap times. Familiarize yourself with your specific model’s button layout for optimal use.
Lap Time Recording
The lap time function allows you to measure intermediate times during an event without pausing the overall chronograph. Pressing the “Lap” button while the chronograph is running records a split time, displaying it momentarily while the main timer continues uninterrupted. Subsequent presses record further lap times.
Typically, the display will show the elapsed time alongside the lap time, or allow cycling through recorded lap times. This feature is invaluable for tracking performance in activities like running or swimming, providing detailed timing information. Refer to your model’s specific instructions for accessing and reviewing stored lap times effectively.
Chronograph Accuracy
The accuracy of the chronograph function in your Timex radio clock is generally quite high, typically within a tenth of a second. However, several factors can influence precision, including battery level and environmental conditions. Consistent performance relies on a fresh battery and avoiding extreme temperatures or strong magnetic fields.
While radio synchronization ensures accurate timekeeping, the chronograph itself operates independently. Periodic comparison with a known accurate time source is recommended to verify chronograph accuracy, especially for critical timing applications. Minor deviations are normal, but significant discrepancies may indicate a need for servicing.

Other Useful Features
Beyond core functions, your Timex radio clock offers backlight illumination, water resistance, and efficient battery management for extended use and convenience.
Backlight Operation
Your Timex radio clock features a convenient backlight function for enhanced visibility in low-light conditions. Typically, pressing a designated button – often labeled ‘Light’ or a similar icon – activates the backlight. The duration of illumination can vary, ranging from a few seconds to a longer period, and may be adjustable within the clock’s settings.
Some models offer different backlight intensity levels, allowing you to customize the brightness to suit your preferences and conserve battery life. Refer to the ‘Advanced Settings’ section of this manual for details on adjusting backlight settings, if available on your specific Timex radio clock model. Consistent use will reduce battery life.
Water Resistance Explained
Timex radio clocks may offer varying degrees of water resistance, indicated by an ATM (atmospheres) rating. A rating of 3 ATM generally means the clock is splash-resistant, suitable for everyday handwashing, but not for swimming or showering. 5 ATM indicates suitability for shallow water activities like swimming, but avoid high-impact water sports.
Higher ratings, such as 10 ATM or more, signify suitability for snorkeling or diving. However, water resistance isn’t permanent and can diminish over time due to wear and tear, or damage to seals. Avoid operating buttons underwater and regularly inspect the crown and seals for integrity to maintain water resistance.
Battery Life and Replacement
Timex radio clocks typically utilize a standard button-cell battery, such as a CR2025 or similar, to maintain timekeeping and function even when not receiving a radio signal; Battery life varies depending on usage, particularly backlight frequency and alarm settings, but generally lasts between 12 to 24 months.
When the battery is low, the display may become dim or exhibit erratic behavior. Replacement requires a small screwdriver and careful handling. Always dispose of used batteries responsibly, following local regulations. Refer to the manual for specific battery type and replacement instructions to avoid damage.

Advanced Settings and Customization
Explore world time zones, adjust date/calendar formats, and fine-tune display contrast for a personalized experience with your Timex radio clock’s advanced options.
World Time Settings
Your Timex radio clock allows you to display the time in multiple cities around the globe. Access the world time setting through the mode button, navigating to the world time function; Select a city from the pre-programmed list, or manually input the time zone offset for locations not included.
This feature is incredibly useful for travelers or individuals needing to track time across different regions. Remember to confirm daylight saving time settings for accurate representation. The clock typically stores several city profiles, enabling quick switching between frequently viewed locations. Refer to the full manual for a complete list of supported cities and detailed instructions on manual offset adjustments.
Date and Calendar Adjustment
Adjusting the date and calendar on your Timex radio clock is typically done through the mode button, accessing the settings menu. Navigate to the date display and use the buttons to increment the year, month, and day. Ensure the correct date format (MM/DD/YYYY or DD/MM/YYYY) is selected within the settings.
The clock automatically adjusts for leap years when receiving the radio signal, but manual verification is recommended. Incorrect date settings can affect time synchronization. Consult the complete user manual for specific button combinations and detailed instructions tailored to your model.
Display Contrast Adjustment
Adjusting the display contrast ensures optimal readability in various lighting conditions. Typically, this is achieved by pressing and holding a dedicated button – often ‘Light’ or ‘Mode’ – while simultaneously pressing another button (like ‘Start/Stop’) to cycle through contrast levels.
Observe the display carefully while adjusting; find the setting where characters are clear and sharply defined, without appearing washed out or overly dark. Some models offer multiple contrast levels, while others have a continuous adjustment. Refer to your specific model’s manual for precise instructions and button combinations.

Troubleshooting Common Issues
This section addresses frequent problems like signal reception, display errors, and button malfunctions, offering solutions to restore your Timex radio clock’s functionality.
Clock Not Receiving Radio Signal
If your Timex radio clock isn’t synchronizing, several factors could be at play. Ensure you’re within range of a radio signal transmitter; reception is often better at night. Obstructions like tall buildings or indoor locations can interfere. Try moving the clock to a different location, near a window, for improved reception.
Also, verify that the ‘Radio Control’ function is activated in the settings. A weak battery can hinder signal reception, so consider replacing it. Manual synchronization attempts can sometimes resolve the issue. If problems persist, consult the official Timex support resources for further assistance and specific troubleshooting steps related to your model.
Display Problems and Errors
If your Timex radio clock’s display is dim, faded, or showing unusual characters, first check the backlight function and ensure it’s activated. A low battery is a common cause of display issues; replace it with a fresh one. If segments are missing or the display is entirely blank, attempt a reset by removing the battery for a few minutes, then reinserting it.
Error codes may appear, indicating specific problems. Refer to the full user manual (available on the Timex website) to decipher these codes. If the issue persists after these steps, contact Timex customer support for further diagnosis and potential repair options.
Button Malfunctions
If buttons on your Timex radio clock become unresponsive or exhibit erratic behavior, begin by ensuring they are clean and free of debris; Gently press each button several times to see if responsiveness improves. A low battery can sometimes cause button malfunctions, so replacing the battery is a good first step.
Avoid excessive force when pressing buttons. If the problem continues, a reset – removing and reinserting the battery – might resolve the issue. If buttons remain faulty, contact Timex support, as internal component repair may be necessary; do not attempt self-repair.
Care and Maintenance
Regular cleaning with a soft, damp cloth preserves your Timex radio clock’s appearance. Avoid harsh chemicals and ensure proper storage to maintain functionality.
Cleaning Your Timex Radio Clock
To maintain the pristine condition of your Timex radio clock, regular cleaning is essential. Use a remarkably soft, lint-free cloth, slightly dampened with water – avoid excessive moisture. Gently wipe the case and crystal to remove dust, fingerprints, and grime. Never use abrasive cleaners, solvents, or detergents, as these can damage the finish or impair the clock’s functionality.
For stubborn marks, a very mild soap solution can be cautiously applied, followed by a thorough wipe with a clean, damp cloth. Ensure the clock is completely dry before operating it. Avoid spraying any liquids directly onto the clock; instead, dampen the cloth first. Proper cleaning will help preserve the appearance and longevity of your Timex radio clock.
Storage Recommendations
If you plan to store your Timex radio clock for an extended period, several precautions should be taken. Remove the battery to prevent potential leakage and damage to the internal components. Store the clock in a cool, dry place, away from extreme temperatures and humidity. A protective case or pouch is recommended to shield it from dust and scratches.
Avoid storing the clock near strong magnetic fields, as these can interfere with its radio synchronization capabilities. Before resuming use, reinsert a fresh battery and allow the clock to resynchronize with the time signal. Following these storage recommendations will help ensure your Timex radio clock remains in optimal working condition.
Servicing Information
Timex radio clocks are engineered for reliability, but occasional servicing may be required. The user should not attempt repairs beyond battery replacement or cleaning, as this could void the warranty and damage the intricate mechanisms. For any issues not addressed in this manual, or if the clock requires internal repair, contact Timex customer support or an authorized service center.
Attempting unauthorized servicing can compromise the clock’s accuracy and water resistance. Qualified technicians have the necessary tools and expertise to diagnose and resolve complex problems, ensuring your Timex radio clock continues to function optimally for years to come.
Resources and Support
Access the official Timex website for FAQs, downloadable manuals, and customer support options to resolve any issues with your radio clock quickly.
Timex Official Website and Support
For comprehensive assistance with your Timex radio clock, the official Timex website (Timex.com) is your primary resource. Here, you’ll discover a dedicated support section featuring frequently asked questions addressing common concerns and troubleshooting steps. You can also download digital copies of your clock’s user manual in multiple languages, ensuring easy access to detailed instructions.
If you require further personalized support, Timex offers various contact options, including a customer service phone line and an online contact form. These channels allow you to directly connect with Timex representatives who can provide expert guidance and assistance with any issues you may encounter. Timex is committed to ensuring a positive user experience with their products.
Frequently Asked Questions (FAQ)
Q: Why isn’t my Timex radio clock receiving a signal? Ensure adequate open space near a window, away from interference. Q: How often does the clock synchronize? Typically, overnight during off-peak hours. Q: Can I manually set the time if the signal is weak? Yes, but automatic synchronization is recommended for accuracy. Q: What does it mean when the radio signal icon flashes? It indicates the clock is searching for a signal.
Q: How do I reset the clock to factory settings? Refer to your user manual for specific instructions. Q: What type of battery does it use, and how long does it last? Battery type and lifespan vary by model; check the manual. Q: Is the chronograph accurate? It offers precision timing, but external factors can influence accuracy.
User Manual Download Links
Accessing your Timex radio clock’s manual is easy! Visit the official Timex website at Timex Support to locate downloadable PDFs for various models. Search by model number (found on the clock’s caseback) for the most accurate documentation. Alternatively, explore dedicated watch manual archives like ManualsLib (ManualsLib ⎯ Timex).
These resources provide comprehensive guides covering setup, operation, troubleshooting, and detailed feature explanations. Ensure you download the manual specific to your Timex radio clock model for correct information and optimal use.