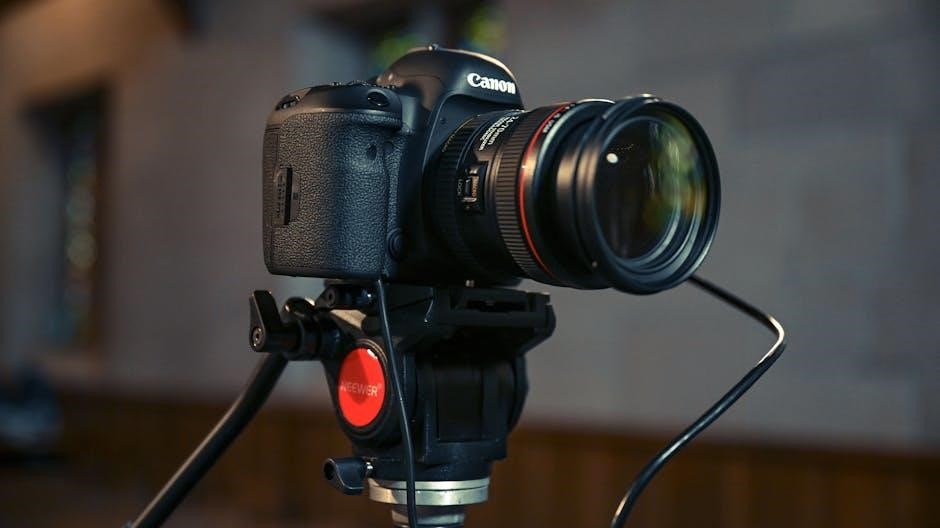
Canon PIXMA MX922 User Manual: A Comprehensive Guide
Welcome! This guide unlocks your Canon MX922’s potential‚ offering detailed instructions and troubleshooting for optimal performance‚ including PDF manual access․

Congratulations on selecting the Canon PIXMA MX922! This all-in-one printer delivers exceptional printing‚ copying‚ scanning‚ and faxing capabilities‚ designed for both home and office use․ This comprehensive user manual will guide you through every aspect of your new printer‚ from initial setup to advanced features․
You’ll discover how to maximize its potential‚ utilizing its versatile functions and understanding its intuitive control panel․ Accessing the online manual or the PDF version provides detailed instructions․ We’ll cover everything from paper handling to mobile printing with the Canon PRINT app‚ ensuring a seamless experience․ Prepare to unlock a world of possibilities with your PIXMA MX922!
Unboxing and Initial Setup
Carefully unpack your Canon PIXMA MX922‚ ensuring all components are present – the printer itself‚ power cord‚ print head‚ ink cartridges‚ and setup CD-ROM․ Remove all protective tape and packaging materials‚ both inside and outside the printer․ Connect the power cord and turn the printer on․
Follow the on-screen prompts to select your language and region․ The printer will guide you through installing the ink cartridges and loading paper into the tray․ Refer to the included manual or PDF instructions for detailed guidance․ Finally‚ connect to your computer or network to complete the initial setup and begin printing․ A successful setup ensures optimal performance!
System Requirements and Software Installation
To install the Canon PIXMA MX922 software‚ ensure your system meets the requirements: Windows or macOS‚ sufficient hard drive space‚ and an internet connection․ Insert the provided CD-ROM or download the latest drivers and software from the Canon website․
Run the downloaded installer and follow the on-screen instructions․ The installation process includes printer drivers‚ scanning utilities (like Canon IJ Scan Utility)‚ and potentially other applications․ Accept the license agreement and choose your connection method – USB or network․ A successful installation is crucial for accessing all printer features․ Consult the manual or PDF for troubleshooting․

Printer Features and Functions
The Canon PIXMA MX922 boasts versatile printing‚ copying‚ scanning‚ and fax capabilities‚ offering high-quality results and convenient features for home or office use;
Overview of Printing Capabilities
The Canon PIXMA MX922 delivers exceptional printing performance with a focus on quality and versatility․ It supports various paper types and sizes‚ ensuring compatibility with diverse printing needs․ Users can expect vibrant color prints thanks to Canon’s FINE print head technology‚ alongside crisp‚ clear text documents․
This printer excels in producing borderless photos‚ enhancing visual appeal for cherished memories․ Printing directly onto CDs and DVDs is also supported‚ adding a personalized touch to discs․ The MX922 offers automatic duplex printing‚ saving paper and reducing environmental impact․ Furthermore‚ compatibility with mobile printing solutions‚ like the Canon PRINT app‚ allows for convenient printing from smartphones and tablets‚ streamlining the printing process for modern users․
Copying Functionality Explained
The Canon PIXMA MX922’s copying features offer efficient document reproduction․ Users can create both black and white‚ or full-color copies with adjustable quality settings – draft‚ standard‚ and high – to balance speed and detail․ Automatic document feeding (ADF) facilitates multi-page copying without manual intervention‚ significantly boosting productivity․
Copy reduction and enlargement options‚ ranging from 25% to 400%‚ allow for flexible document scaling․ The MX922 supports two-sided copying‚ conserving paper and reducing waste․ Borderless copying is also available for photographs‚ maximizing the image area․ Furthermore‚ the copier includes features like ID card copy‚ enabling efficient duplication of identification cards‚ and a copy quality adjustment for optimal results․
Scanning Features and Options
The Canon PIXMA MX922 boasts versatile scanning capabilities‚ supporting both color and monochrome scans․ It offers a high optical resolution of up to 4800 x 4800 dpi‚ ensuring detailed image capture․ The Automatic Document Feeder (ADF) streamlines multi-page scanning‚ while the flatbed scanner accommodates books and delicate items․
Scanning to various formats‚ including PDF‚ JPEG‚ and TIFF‚ provides flexibility for different needs․ The “Scan to Email” functionality allows direct document transmission․ Canon IJ Scan Utility software enhances scanning options‚ including auto document fix and optical character recognition (OCR) for searchable PDFs․ Users can also create and edit PDF files directly from the scanner interface‚ simplifying document management․
Fax Capabilities and Setup
The Canon PIXMA MX922 incorporates comprehensive fax functionality‚ enabling sending and receiving documents efficiently․ Initial setup requires connecting a telephone line and configuring fax settings through the printer’s control panel․ Speed dial numbers can be programmed for quick access to frequently contacted individuals or businesses․
The MX922 supports fax resolution options to balance speed and quality․ Features like fax forwarding and auto answer mode enhance convenience․ Should issues arise‚ the user manual provides guidance on troubleshooting common fax errors․ Canon also offers shipping instructions for repair facility access if needed‚ ensuring continued fax operation․

Navigating the Printer’s Control Panel
Master the interface! Explore the LCD screen and operation buttons for seamless menu access and control of your Canon MX922’s features․
Understanding the LCD Screen
The LCD screen is your central hub for monitoring printer status and navigating settings on your Canon PIXMA MX922․ It displays crucial information like ink levels‚ paper status‚ and selected functions․ Utilize the screen to preview scans before saving‚ confirm print settings‚ and access the comprehensive menu system․
Icons clearly indicate different modes – printing‚ copying‚ scanning‚ and faxing․ Error messages are also prominently displayed‚ guiding you towards solutions․ The screen’s responsiveness ensures smooth interaction‚ allowing for quick adjustments and efficient operation․ Familiarize yourself with the layout to maximize your control over the printer’s capabilities and streamline your workflow․ It’s a key component for effortless use․
Using the Operation Buttons
The Canon PIXMA MX922’s operation buttons provide direct control over its functions․ The Start button initiates printing‚ copying‚ or scanning‚ while the Stop button halts current operations․ Dedicated buttons for color and black & white printing offer quick selection․ Arrow buttons navigate the LCD screen’s menu system‚ allowing access to advanced settings and options․
The Menu button opens the main menu‚ revealing a range of customizable features․ The OK button confirms selections‚ and the Cancel button returns to the previous screen․ These buttons‚ combined with the LCD screen‚ create an intuitive interface․ Mastering their functions ensures efficient printer control and unlocks the full potential of your MX922․ Practice using them to become proficient․
Accessing the Menu System
The Canon PIXMA MX922’s menu system is accessed by pressing the ‘Menu’ button on the control panel․ This reveals a hierarchical structure of settings‚ categorized for easy navigation․ Use the arrow buttons (up‚ down‚ left‚ right) to scroll through the main menu options‚ such as ‘Print Settings‚’ ‘Copy Settings‚’ ‘Scan Settings‚’ and ‘Device Settings․’
Press ‘OK’ to select a category‚ then use the arrow buttons again to navigate its submenus․ The LCD screen displays the current selection and available options․ To return to the previous menu‚ press the ‘Cancel’ button․ Explore each section to customize your MX922’s functionality‚ adjusting print quality‚ paper size‚ and network settings to your preferences․

Paper Handling and Media Types
Learn proper loading techniques for various supported paper sizes and weights‚ plus utilizing the Automatic Document Feeder (ADF) for efficient document handling․
Supported Paper Sizes and Weights
The Canon PIXMA MX922 expertly handles a diverse range of paper types and sizes‚ ensuring versatility for all your printing needs․ Supported paper sizes include US Letter‚ Legal‚ Executive‚ A4‚ B5‚ A5‚ and Envelopes (DL‚ COM10)․ For optimal results‚ adhere to recommended paper weights: plain paper between 16-67 lb‚ and Canon photo paper ranging from 20-30 lb․
Heavier paper stock‚ such as glossy or matte photo paper‚ is ideal for vibrant‚ high-quality images․ Always check the paper packaging for specific weight recommendations compatible with inkjet printers․ Incorrect paper weight can lead to jams or diminished print quality․ Proper paper selection is crucial for maximizing the MX922’s performance and achieving professional-looking outputs․
Loading Paper Correctly
Proper paper loading is essential for smooth‚ reliable printing with your Canon PIXMA MX922․ First‚ extend the paper tray and adjust the paper guides to match the width of your paper stack․ Fan the paper stack to prevent sticking‚ then load it face down‚ ensuring it isn’t overfilled – the maximum capacity is indicated on the tray․
Avoid curling or damaged paper․ Gently push the tray back into the printer․ The MX922 will automatically detect the paper size; confirm this on the LCD screen․ For envelopes‚ load them short edge first․ Incorrect loading can cause paper jams or skewed prints․ Always refer to the printer’s display for guidance․
Using the Automatic Document Feeder (ADF)
The Canon PIXMA MX922’s Automatic Document Feeder (ADF) simplifies copying and scanning multiple pages․ Lift the ADF cover and fan the stack of paper before loading it face up‚ ensuring it’s aligned with the guides․ Adjust the paper guides snugly‚ but not too tightly․ The ADF supports various paper sizes; confirm compatibility in the printer settings․
Press the appropriate button on the control panel to initiate scanning or copying via the ADF․ The printer will automatically feed each page․ Avoid using wrinkled‚ folded‚ or stapled documents․ Regularly check for and remove any jammed paper․ Proper ADF usage streamlines document handling‚ saving you time and effort․

Printing from Various Devices
Effortlessly print from Windows‚ macOS‚ and mobile devices using the Canon PRINT app‚ ensuring seamless connectivity and convenient document output from anywhere․
Printing from Windows Computers
Connecting to your Windows PC is straightforward․ Ensure your Canon PIXMA MX922 is powered on and connected via USB or network․ Windows should automatically detect the printer and install basic drivers․ For full functionality‚ download and install the latest drivers from the Canon website – this unlocks advanced features․
To print‚ open your document‚ select “Print‚” and choose the MX922 from the printer list․ Adjust settings like paper size‚ quality‚ and color mode within the print dialog box․ Explore options for duplex (two-sided) printing to save paper․ Regularly updating your printer driver ensures compatibility and optimal performance with your Windows operating system․ Canon provides detailed instructions and support resources online․
Printing from macOS Computers
Setting up your Canon PIXMA MX922 on a Mac is typically seamless․ Connect via USB or network‚ and macOS should automatically detect and add the printer․ If not‚ access “System Preferences” then “Printers & Scanners” to manually add it․ Downloading the latest macOS drivers from Canon’s website is recommended for full functionality and access to all features․
To initiate printing‚ open your document‚ select “File” then “Print․” Choose the MX922 from the printer list․ Customize settings like paper type‚ print quality‚ and color options․ macOS offers robust printing controls․ Canon’s online resources provide detailed instructions and troubleshooting guides specifically for macOS users‚ ensuring a smooth printing experience․
Mobile Printing Options (Canon PRINT App)
Canon PRINT‚ a free mobile app for iOS and Android‚ unlocks convenient wireless printing from your smartphone or tablet to the PIXMA MX922․ Download the app and connect to the same Wi-Fi network as your printer․ The app simplifies printing photos‚ documents‚ and web pages directly from your mobile device․
Beyond basic printing‚ Canon PRINT offers scan-to-mobile functionality‚ device status monitoring‚ and ink level checks․ You can also print directly from cloud services like Dropbox and Google Drive․ Detailed instructions within the app guide you through setup and usage․ Explore the app’s features for a streamlined mobile printing experience with your MX922․

Troubleshooting Common Issues
Resolve problems quickly! This section provides solutions for paper jams‚ print quality issues‚ connectivity errors‚ and deciphering error messages for your MX922․
Paper Jams and Solutions
Addressing paper jams is crucial for uninterrupted printing․ First‚ power off the MX922 and carefully open the appropriate access panel – rear tray‚ cassette unit‚ or ADF․ Gently remove any visible jammed paper‚ avoiding torn pieces․ Inspect all paper paths for obstructions․
Ensure the paper type is supported and loaded correctly‚ avoiding overfilling․ If jams persist‚ check the paper feed rollers for damage or debris; cleaning may be necessary․ Avoid using damaged or damp paper․ Refer to the detailed diagrams in the manual for specific locations․ Restart the printer after clearing the jam‚ and test with a fresh sheet․ Consistent jams may indicate a mechanical issue requiring service․
Print Quality Problems and Fixes
Suboptimal print quality can stem from several factors․ Begin by verifying ink levels and ensuring genuine Canon cartridges are installed․ Run the print head cleaning utility via the printer’s control panel or Canon IJ Scan Utility software – multiple cycles may be needed․
Check paper type settings within your print driver; mismatched settings cause blurring or streaking․ Inspect the print head nozzles for clogs; a deep cleaning may resolve this․ Ensure the scanner glass is clean for optimal scan-to-print results․ Adjust print density settings for darker or lighter output․ If issues persist‚ consult the manual for advanced troubleshooting or contact Canon support․
Connectivity Issues and Resolution
Experiencing connectivity problems? First‚ verify the printer is powered on and within range of your Wi-Fi network․ Ensure the correct network is selected within the printer’s settings․ Restart both your printer and your computer or mobile device․ Check the USB cable connection if using a wired setup – try a different port․
Confirm your firewall isn’t blocking communication․ Reinstall the printer drivers from the Canon website‚ ensuring you download the version compatible with your operating system․ Utilize the Canon PRINT app for mobile printing troubleshooting․ If problems continue‚ consult the manual or Canon’s support resources for specific error code solutions․
Error Messages and Their Meanings
Decoding error messages is crucial for quick fixes․ A “Paper Jam” message indicates obstructed paper path – carefully remove any visible obstructions․ “Ink Low” prompts cartridge replacement; using genuine Canon cartridges is recommended․ “B200” often signals a printer parts error‚ potentially requiring service․ “1401” suggests a communication issue between the printer and computer – check cable connections or network settings․
Refer to the manual for a comprehensive list of error codes and their specific resolutions․ Canon’s support website provides detailed explanations and troubleshooting steps for less common errors․ Documenting the error code before seeking assistance can expedite the support process․
Maintenance and Cleaning
Regular cleaning ensures optimal performance! Clean the print head‚ scanner glass‚ and replace ink cartridges as needed‚ following the manual’s detailed instructions;
Cleaning the Print Head
Maintaining optimal print quality requires periodic print head cleaning․ The Canon PIXMA MX922 offers a built-in cleaning cycle accessible through the printer’s control panel or via the software on your computer․ Access the manual for specific step-by-step instructions tailored to your operating system․
If standard cleaning doesn’t resolve issues like streaks or faded prints‚ a deep cleaning cycle is available‚ though it consumes more ink․ Refer to the user manual for guidance on when and how to perform a deep clean․ Avoid frequent deep cleaning as it can deplete ink unnecessarily․ Always allow the printer to rest for a few minutes after cleaning before resuming printing․
Cleaning the Scanner Glass
To ensure high-quality scans‚ regularly clean the scanner glass of your Canon PIXMA MX922․ Begin by powering off the printer and disconnecting it from the power source; Gently wipe the glass with a soft‚ lint-free cloth slightly dampened with distilled water or a commercially available glass cleaner – avoid harsh chemicals․
Refer to the user manual for specific recommendations on cleaning solutions․ Ensure the glass is completely dry before resuming operation․ Dust and fingerprints can significantly impact scan quality‚ leading to blurry or distorted images․ Regular cleaning prevents buildup and maintains optimal scanning performance․ Always handle the glass with care to avoid scratches․
Replacing Ink Cartridges
Replacing ink cartridges in your Canon PIXMA MX922 is straightforward․ First‚ ensure the printer is powered on․ The printer will typically notify you when ink levels are low․ Open the printer cover to access the cartridge holder․ Gently press the cartridge you wish to replace to release it‚ then remove it․
Unpack the new cartridge‚ removing the protective tape and orange cover․ Insert the new cartridge firmly into the holder until it clicks into place․ Close the printer cover․ The printer may perform a cleaning cycle after installation․ Consult the user manual for specific cartridge numbers and proper disposal instructions․

Advanced Features and Settings
Explore advanced options! Create PDF files‚ utilize scan-to-email‚ configure network printing‚ and ensure optimal performance with updated printer drivers and settings․
Creating and Editing PDF Files
Unlock PDF capabilities with your Canon PIXMA MX922! This section details how to effortlessly create and manage Portable Document Format files directly from your printer․ Utilizing the Canon IJ Scan Utility – compatible application software – you can scan documents and convert them into searchable and shareable PDFs․
The process is streamlined for both simple and complex documents․ Explore options for adjusting resolution‚ color settings‚ and file size to tailor PDFs to your specific needs․ Learn how to combine multiple scans into a single PDF document‚ ensuring organized and efficient file management․ Furthermore‚ discover how to access detailed instructions within the application software for advanced PDF editing features‚ maximizing your document workflow․
Using Scan to Email Functionality
Simplify document sharing with Scan to Email! Your Canon PIXMA MX922 allows direct scanning and emailing of documents‚ eliminating the need for a computer intermediary․ This feature streamlines workflows‚ perfect for quick document distribution; Initial setup requires configuring your email settings within the printer’s menu system – including SMTP server details and login credentials․
Once configured‚ simply select the Scan to Email option on the control panel‚ specify the recipient’s address‚ and initiate the scan․ The printer handles the rest‚ automatically sending your scanned document as an attachment․ Explore options for adjusting scan resolution and file format to optimize email delivery and readability․ Ensure a stable network connection for reliable performance․
Setting Up Network Printing
Enable convenient wireless printing! Connecting your Canon PIXMA MX922 to your network unlocks printing from multiple devices without direct cable connections․ Begin by accessing the printer’s network settings via the control panel’s menu system․ Select your Wi-Fi network from the available list and enter the password when prompted․ Alternatively‚ utilize a USB setup connection for initial configuration․
Once connected‚ the printer will obtain an IP address․ Install the appropriate printer driver on each computer you wish to print from‚ specifying the printer’s network address․ Ensure your computer and printer are on the same network․ Explore advanced settings for security protocols and network discovery options․ Regular driver updates ensure optimal compatibility and performance․
Understanding Printer Drivers and Updates
Printer drivers are essential software enabling communication between your computer and the Canon PIXMA MX922․ These drivers translate commands from your applications into a language the printer understands․ Canon regularly releases driver updates to enhance performance‚ fix bugs‚ and improve compatibility with new operating systems․
Keeping your drivers current is crucial! You can download the latest drivers from the official Canon website․ During installation‚ follow the on-screen instructions carefully․ Outdated drivers can cause printing errors or functionality issues․ Regularly check for updates‚ either manually or by utilizing Canon’s software update utility․ Proper driver management ensures a seamless printing experience and unlocks the full potential of your MX922․