Galileo telescopes require careful setup and usage‚ as detailed in provided instructions‚ ensuring optimal viewing experiences․ Prioritize reading the manual before assembly!
Understanding Reflector Telescopes
Galileo reflector telescopes utilize mirrors to gather and focus light‚ differing from refractors using lenses․ These instruments‚ detailed in the instruction sheets‚ offer advantages like eliminating chromatic aberration․ Proper assembly‚ as outlined in the manual‚ is crucial for optimal performance․ Understanding this design aids in appreciating the telescope’s capabilities and following the provided instructions for maintenance and cleaning‚ ensuring longevity and clear views of celestial objects․
Brief History of Galileo’s Telescopes
Galileo Galilei’s early telescopes‚ though rudimentary by today’s standards‚ revolutionized astronomy․ The included instructions build upon this legacy․ He didn’t invent the telescope‚ but significantly improved it‚ making groundbreaking observations․ Modern Galileo telescopes‚ like yours‚ retain that spirit of discovery․ Carefully follow the manual for assembly and usage‚ echoing Galileo’s meticulous approach to unlocking the secrets of the universe‚ as detailed in the provided guidance․

Unboxing and Parts Identification
Carefully unpack your Galileo telescope‚ referencing the included parts list and instructions․ Verify all components are present before proceeding with assembly․
Telescope Tube Assembly
Begin by gently removing the telescope tube from its protective packaging․ Ensure no debris is present on the lenses․ Locate the dovetail plate attachment point on the tube’s underside‚ as shown in the instructions․ Carefully align this with the mount’s corresponding receiver․ Secure the tube using the provided screws‚ tightening them firmly but avoiding over-tightening‚ which could damage the tube or mount․ Refer to the diagram in your manual for correct orientation and screw placement․
Mount Components
The mount consists of several key parts: the tripod base‚ equatorial mount head‚ slow-motion control cables‚ and counterweight shaft․ Familiarize yourself with each component using the instructions diagram․ The equatorial mount allows tracking celestial objects as Earth rotates․ Attach the slow-motion cables to their designated ports on the mount head for precise adjustments․ Ensure the counterweight shaft is securely fastened before adding the counterweight‚ as detailed in the manual․
Eyepieces and Accessories
Your Galileo telescope includes various eyepieces offering different magnifications – consult the instructions for specifics․ A Barlow lens is provided to increase magnification․ Additional accessories may include a finderscope for easier object location and cleaning supplies for the lenses․ Handle eyepieces carefully‚ avoiding fingerprints․ Refer to the manual for proper insertion and usage of each accessory to maximize your observing experience․
Assembly Instructions
Follow the instructions carefully for proper assembly! Securely attach the tube‚ tripod‚ and mount‚ referencing the manual for detailed guidance and diagrams․
Attaching the Telescope Tube to the Mount
Carefully align the telescope tube with the mount‚ ensuring a snug and secure fit․ Loosen the tube rings slightly to accommodate the tube‚ then tighten them gradually for stability․ Refer to the instruction sheet for specific mounting points and screw placements․ Avoid over-tightening‚ which could damage the tube or mount․ Double-check that the tube is balanced before proceeding‚ as this impacts smooth tracking․ Proper attachment is crucial for clear observations and prevents accidental drops during use‚ as outlined in the manual․
Installing the Tripod
Extend the tripod legs to your desired height‚ ensuring each leg is securely locked into place․ Spread the legs for maximum stability‚ especially on uneven ground․ The tripod provides a stable base for your Galileo telescope․ Refer to the instruction sheet for proper leg locking mechanisms․ Confirm the tripod is level before mounting the telescope to prevent wobbling and ensure accurate viewing․ A stable tripod is essential for sharp images and comfortable observing sessions‚ as detailed in the manual․
Securing the Mount to the Tripod
Carefully place the telescope mount onto the tripod head‚ aligning the central screw․ Tighten the screw firmly to secure the mount‚ but avoid over-tightening․ Ensure the mount is stable and doesn’t wobble․ This connection is crucial for smooth tracking and accurate pointing․ Consult the instruction sheet for specific mount-to-tripod attachment details․ A secure mount prevents vibrations and provides a stable platform for observing‚ as outlined in the manual․

Using the Finderscope
Align the finderscope with the main telescope‚ using daytime objects for calibration‚ as per the instructions․ This aids in locating celestial targets efficiently․
Aligning the Finderscope
Proper finderscope alignment is crucial for effortless celestial navigation․ Begin by loosening the adjustment screws on the finderscope bracket․ Then‚ locate a distant‚ stationary daytime object – a treetop or building works well․ Center this object in the main telescope’s eyepiece‚ utilizing a low-power eyepiece for a wider field of view․
Now‚ without moving the main telescope‚ adjust the finderscope’s screws until the same object is centered within its crosshairs․ Tighten the screws to secure the alignment․ Recheck the alignment periodically‚ especially after transport‚ following the instructions provided with your Galileo telescope․
Locating Celestial Objects
Utilize star charts or astronomy apps to identify your target․ Begin with a low-power eyepiece for a broader field of view‚ making initial locating easier; Once aligned‚ the finderscope becomes invaluable; center the object within its crosshairs․ Slowly move the telescope until the object appears in the main eyepiece․
Remember that Earth’s rotation causes objects to drift‚ so continuous‚ gentle adjustments are necessary․ Refer to the instructions for specific guidance on navigating the night sky with your Galileo telescope‚ and practice patience!
Understanding Magnification with the Finderscope
The finderscope offers lower magnification than the main telescope‚ providing a wider field of view for easier object acquisition․ It’s crucial for initial alignment; what you see centered in the finderscope will‚ with proper alignment‚ also be visible in the main eyepiece․
Refer to your Galileo telescope instructions to understand the finderscope’s specific magnification․ Remember‚ higher magnification isn’t always better – a wider field of view aids in locating faint objects․ Practice using both scopes together for optimal results!

Installing and Using Eyepieces
Select the appropriate eyepiece from your Galileo telescope accessories‚ carefully insert it into the focuser‚ and secure it for clear viewing․
Choosing the Right Eyepiece
Selecting the correct eyepiece is crucial for optimal viewing with your Galileo telescope․ Lower power eyepieces (higher focal length‚ like 25mm) provide a wider field of view‚ ideal for locating objects and observing larger celestial features like the Moon․ Higher power eyepieces (shorter focal length‚ like 10mm) magnify the image‚ revealing finer details on planets or smaller deep-sky objects․
Consider atmospheric conditions; steady air favors higher magnification․ Start with a lower power eyepiece to find your target‚ then increase magnification gradually for detailed observation․
Inserting the Eyepiece
Before inserting‚ ensure the telescope is pointed in a safe direction․ Gently remove the dust cap from the focuser drawtube․ Slowly slide the chosen eyepiece into the drawtube until it reaches a secure stop․ Avoid forcing it! Tighten the set screw on the focuser‚ if present‚ to lock the eyepiece in place․
Do not overtighten‚ as this could damage the focuser or eyepiece․ Always handle eyepieces by the barrel to avoid fingerprints on the lens surface․
Focusing the Telescope
After inserting the eyepiece‚ slowly turn the focus knobs – either fine or coarse – until the image appears sharp and clear․ Begin with low magnification for easier focusing․ If using a Barlow lens‚ focus carefully as it alters the focal length․
Adjustments may be needed as temperature changes affect the optics․ Practice makes perfect; patience is key to achieving a crisp‚ detailed view!
Understanding Telescope Optics
Galileo telescopes utilize lenses to gather and focus light; proper cleaning with methylated spirit is crucial․ Avoid damage by following instruction guidelines!
The Role of the Barlow Lens
The Barlow lens‚ included with your Galileo telescope‚ effectively increases magnification without changing the eyepiece itself․ It achieves this by lengthening the light path‚ providing a closer look at celestial objects․ Assembly instructions detail its placement between the eyepiece and telescope tube․ Remember‚ while increasing magnification‚ it can also amplify any atmospheric distortions‚ so use it judiciously for optimal viewing․ Experiment with different eyepieces alongside the Barlow to discover the best combination for your observing needs‚ as outlined in the manual․
Cleaning Telescope Lenses
Maintaining clean lenses is crucial for optimal viewing with your Galileo telescope․ The instructions recommend using methylated spirit or a similar lens cleaning solution and soft‚ lint-free cloth․ Avoid abrasive cleaners‚ as they can damage the coating․ Gently wipe in a circular motion‚ removing dust and fingerprints․ Never apply excessive pressure․ Regular cleaning‚ as per the manual‚ preserves image clarity and extends the life of your telescope’s optics‚ ensuring continued enjoyment of the night sky․
Avoiding Optical Damage
Protecting your Galileo telescope’s optics is paramount․ The instructions explicitly warn against looking directly at the sun‚ which can cause immediate and permanent eye damage‚ as well as telescope component failure․ Always replace lens caps when not in use to prevent dust accumulation; Avoid touching the lenses with fingers‚ and never disassemble optical elements․ Following these precautions‚ detailed in the manual‚ ensures longevity and safe operation of your instrument․
Basic Observing Techniques
Begin with locating the Moon and planets‚ utilizing the finderscope as per instructions․ Remember‚ the manual details magnification adjustments for optimal viewing!
Finding Planets
Instructions emphasize starting with brighter planets like Venus or Mars‚ easily located with star charts․ Utilize the finderscope‚ aligned according to the manual‚ to initially pinpoint the general area․
Slowly scan the area with the telescope‚ remembering planets appear as small disks‚ not twinkling stars․ Higher magnification eyepieces‚ detailed in the instructions‚ enhance planetary details․ Patience is key; atmospheric conditions significantly impact visibility‚ as noted in the manual․
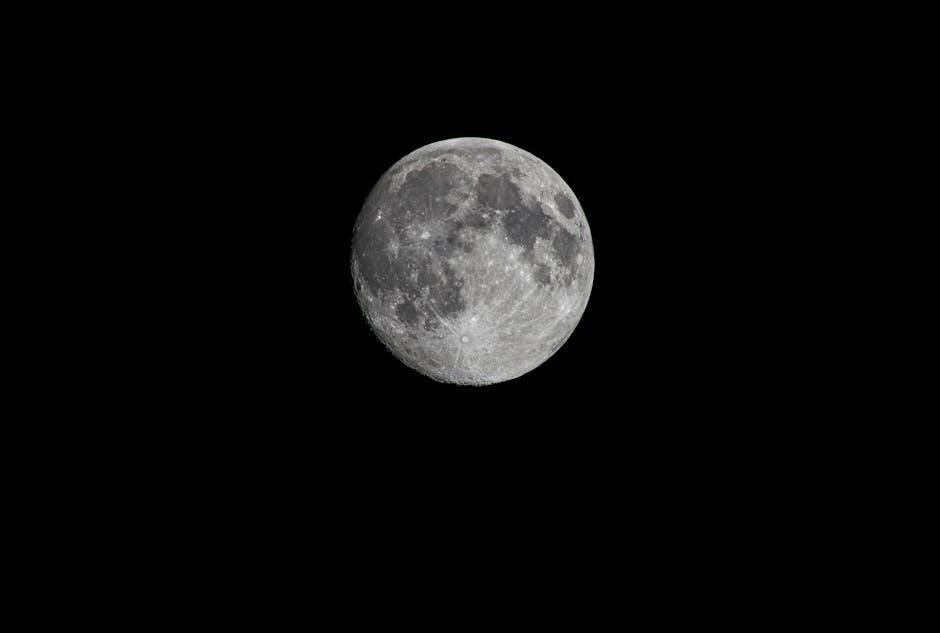
Locating the Moon
The Moon is the easiest celestial object to find‚ even without detailed instructions! Its brightness makes it readily visible in the finderscope․ Begin with a low-power eyepiece‚ as per the manual‚ for a wider field of view․
Observe craters and lunar maria; higher magnification‚ guided by the instructions‚ reveals more detail․ Avoid observing during a full moon‚ as harsh shadows diminish contrast․ The manual suggests adjusting focus for optimal clarity․
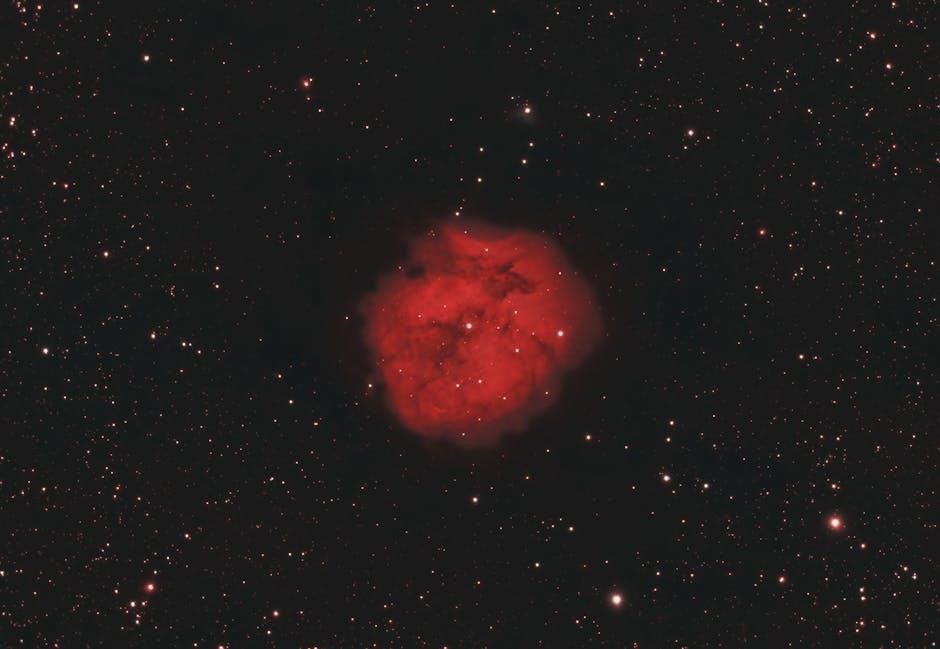
Observing Deep-Sky Objects
Deep-sky observing‚ as outlined in the instructions‚ demands patience and dark skies․ Utilize a low-magnification eyepiece initially to locate faint objects․ Refer to star charts or astronomy apps for guidance‚ complementing the manual․
Nebulae and galaxies appear as faint smudges; avoid excessive magnification‚ which reduces brightness; The instructions emphasize proper focusing and allowing your eyes to adjust to the darkness․ Consider filters for enhanced contrast‚ as detailed in the manual․
Troubleshooting Common Issues
Refer to the instructions for solutions to blurry images or difficulty locating objects․ Ensure proper assembly and focusing‚ as detailed in the manual․
Blurry Images
If images appear blurry‚ revisit the instructions and confirm proper focusing techniques․ Ensure the eyepiece is securely inserted and that all optical components are clean․ Check for atmospheric disturbances‚ as seeing conditions significantly impact clarity․ Gently adjust the focus knob until a sharp image is achieved; avoid excessive force․ Remember to remove lens caps before observing‚ as noted in the manual‚ and consider allowing the telescope to acclimate to the outside temperature;
Difficulty Locating Objects
Struggling to find celestial targets? The instructions emphasize utilizing the finderscope for initial alignment․ Practice aligning it with a distant daytime object first․ Remember that the Earth’s rotation requires constant‚ gentle adjustments․ Refer to star charts or astronomy apps for precise coordinates․ Patience is key; locating faint deep-sky objects takes practice‚ as detailed in the manual․ Begin with brighter objects like the Moon or planets for easier acquisition․
Mount Instability
If your Galileo telescope mount feels unsteady‚ ensure the tripod is on a level surface․ Tighten all locking knobs and screws securely‚ as outlined in the instructions․ Avoid extending the tripod legs fully‚ which can reduce stability․ Do not overload the mount with accessories․ Wind can also contribute to instability; observe in sheltered locations․ Regularly check for loose parts and refer to the manual for proper tightening procedures․
Maintenance and Storage
Protect the Galileo telescope’s optics by replacing lens caps when not in use‚ and store it in a dry‚ safe place‚ following instructions․
Protecting the Optics
Maintaining the pristine condition of your Galileo telescope’s lenses is crucial for optimal performance․ Always replace the dust caps immediately after use to prevent dust accumulation and potential scratches․ Utilize methylated spirit or a similar lens-cleaning solution for gentle cleaning‚ avoiding abrasive materials․
Never touch the lens surfaces directly with your fingers․ Careful handling and regular‚ gentle cleaning‚ as per the instructions‚ will ensure clear and enjoyable observations for years to come‚ preserving the telescope’s optical integrity․
Proper Storage Conditions
To safeguard your Galileo telescope‚ store it in a cool‚ dry environment‚ away from direct sunlight and excessive humidity․ A dedicated case or a clean‚ dust-free room is ideal․ Avoid locations with significant temperature fluctuations‚ which can cause condensation on the optics․
Following these instructions ensures the telescope remains in peak condition․ Proper storage prevents damage and maintains its performance‚ guaranteeing countless hours of celestial observation enjoyment․
Regular Cleaning Schedule
Maintain optimal performance by adhering to a regular cleaning schedule for your Galileo telescope․ Dust the exterior surfaces with a soft‚ lint-free cloth every few weeks․ For lenses‚ use methylated spirit or a specialized lens cleaning solution‚ applying gently․
These instructions help prevent scratches and ensure clear views․ Avoid abrasive cleaners‚ and always store the telescope covered when not in use‚ protecting the delicate optics․
Advanced Features and Accessories
Enhance your Galileo telescope with filters‚ motorized mounts‚ or astrophotography adaptations‚ following specific instructions for optimal performance and expanded capabilities․
Filters for Enhanced Viewing
Galileo telescope filters significantly improve viewing clarity and contrast‚ especially for planetary observation or lunar details․ Different colored filters enhance specific features; for instance‚ a red filter boosts contrast on Mars‚ while a blue filter sharpens details on Jupiter․ Always consult the instruction manual for proper filter selection and installation‚ ensuring a secure fit to avoid light pollution and maximize observational quality․ Experimenting with filters unlocks a richer‚ more detailed astronomical experience․
Motorized Mounts
Upgrading your Galileo telescope with a motorized mount greatly simplifies tracking celestial objects as Earth rotates․ These mounts‚ often controlled via a hand controller or smartphone app‚ counteract Earth’s movement‚ keeping planets and nebulae centered in your eyepiece․ Refer to the instruction manual for specific motor setup and calibration procedures․ Motorized mounts are essential for long-exposure astrophotography‚ providing stable and accurate tracking for stunning images․
Astrophotography Adaptations
Transforming your Galileo telescope for astrophotography requires specific adaptations․ A T-adapter connects your camera to the telescope’s focuser‚ while a motorized equatorial mount is crucial for long-exposure tracking․ Consult the instruction manual for compatible adapters and proper mounting techniques․ Software is needed for image capture and processing․ Patience and practice are key to capturing stunning images of the night sky with your telescope․

Safety Precautions
Never look directly at the sun through the Galileo telescope; it can cause severe eye damage․ Supervise children during use‚ and handle the telescope with care․
Never Look Directly at the Sun
Directly viewing the sun through any optical instrument‚ including your Galileo telescope‚ is extremely dangerous and can result in immediate and permanent eye damage‚ even blindness․ The concentrated solar rays will burn the retina․
Always use appropriate solar filters specifically designed for telescopes if you wish to observe the sun․ Never attempt to create a filter yourself‚ as improper materials can shatter and allow harmful light through․ Prioritize eye safety above all else during astronomical observation․
Supervising Children
Always provide close supervision when children are using the Galileo telescope․ The telescope contains small parts that could pose a choking hazard‚ and improper use could lead to accidental damage to the instrument or‚ more seriously‚ eye injury․
Ensure children understand the safety precautions‚ particularly the warning against looking directly at the sun․ Teach responsible handling and emphasize the importance of following all instructions carefully․
Avoiding Damage to the Telescope
Protect your Galileo telescope by replacing lens caps when not in use‚ preventing dust accumulation․ Avoid dropping or subjecting the instrument to strong impacts․ Use only recommended cleaning solutions – methylated spirit is suitable for lenses – and gentle cleaning motions․
Never disassemble components beyond what the instructions detail․ Improper handling can compromise optical alignment and overall functionality‚ potentially voiding any warranty․
Galileo Telescope Specifications
Refer to your Galileo telescope’s included accessories list and manual for precise aperture‚ focal length‚ and mount capabilities detailed in the instructions․
Aperture and Focal Length
Understanding aperture and focal length is crucial when following Galileo telescope instructions․ Aperture dictates light-gathering ability‚ impacting image brightness and resolution․ Focal length determines magnification; longer lengths yield higher magnification but narrower fields of view․ Consult your manual to determine your telescope’s specific values․ These specifications‚ detailed in the instructions‚ are vital for optimal performance and selecting appropriate eyepieces․ Knowing these parameters allows for informed observing choices and maximizing your astronomical experience with your Galileo․
Mount Type and Capabilities
The Galileo telescope instructions emphasize understanding your mount’s type – typically altazimuth or equatorial․ Altazimuth mounts are simpler for beginners‚ moving up/down and left/right․ Equatorial mounts‚ though more complex‚ track celestial objects as Earth rotates․ Your manual details specific capabilities‚ including weight limits and smooth movement adjustments․ Proper mount setup‚ per the instructions‚ is essential for stable viewing․ Familiarize yourself with locking mechanisms and balancing procedures for a rewarding observing experience with your Galileo․
Included Accessories List
Your Galileo telescope instructions should detail a comprehensive accessories list․ Expect eyepieces of varying magnifications‚ a finderscope for initial object location‚ and potentially a Barlow lens to increase magnification․ The manual will also list tripod components‚ mount assembly parts‚ and cleaning supplies․ Verify all items are present before assembly‚ referencing the included parts diagram․ Proper accessory use‚ as outlined in the instructions‚ enhances your Galileo observing experience․