Loft Bed Assembly Instructions: A Comprehensive Guide
Navigating loft bed setup requires detailed instructions, safety checks, and understanding components—from initial inventory to optional accessory installation for a secure, functional space.
Understanding Your Loft Bed Kit
Before beginning assembly, familiarize yourself with the components of your loft bed kit. These kits typically include the upper bed section panels, the bed frame, a ladder, and crucial safety rails. Optional accessories, like slatted headboards, desks, or storage units, may be included or purchased separately.
Recognize that assembly times vary; a basic loft bed takes roughly two hours, while adding accessories can extend the process. Detailed manuals from brands like Camaflexi and Dorel Living, for models such as the Concord or CALLUM, are essential resources.
Carefully review all parts against the inventory list to ensure nothing is missing before you start. Understanding the structure – whether it’s a high-rise platform or a standard loft – will guide the assembly process.
Inventory of Parts
A thorough inventory is the first step! Your loft bed kit should contain two loft bed panels (for the ends), the bed frame components, a ladder, and all necessary hardware – bolts, screws, and washers.
Check for safety rails, which are critical, and any included optional accessories like a slatted headboard or desk parts. Compare the physical parts with the parts list in your assembly instructions.
Missing parts can halt progress, so address any discrepancies immediately by contacting customer support or locating replacements online. Ensure you have all the correct quantities of each item before proceeding. A complete inventory prevents frustration and ensures a safe, structurally sound loft bed.
Safety Warnings and General Notes
Prioritize safety! Always follow warnings on the bunk bed end structure and the carton – do not remove warning labels. Assembly typically takes around two hours for the basic bed, with extra time for accessories (15-30 minutes each) and safety rails/desk (about an hour each).
Ensure a stable, level surface for assembly. Two people are recommended for easier and safer construction. Regularly inspect all components and tighten bolts periodically.
Never allow children to assemble the bed. Keep small parts away from children during assembly. Adhering to these guidelines will help prevent accidents and ensure a secure loft bed.

Step-by-Step Assembly Process
Begin by assembling the upper bed section using the loft bed panels as ends, then connect the frame—following a clear, sequential approach for stability.
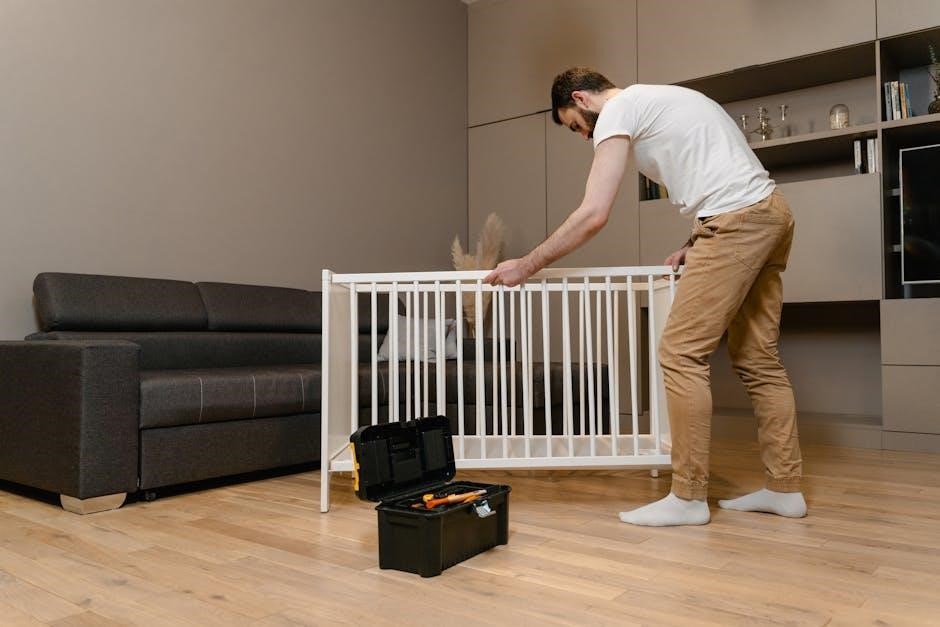
Step 1: Assembling the Upper Bed Section
Initiate the loft bed construction by focusing on the upper section. Carefully unpack and identify the two loft bed panels; these will serve as the foundational ends of the bed structure. Utilizing the provided hardware, securely attach these panels to the side rails, ensuring a flush and stable connection.
Refer to the diagrams in your assembly instructions for correct orientation and bolt placement. Tighten all bolts partially at this stage – avoid full tightening until the entire frame is assembled, allowing for adjustments. Double-check that the panels are aligned correctly to create a rectangular upper bed frame. This initial step establishes the core structural integrity of the loft bed, so precision is key.
Step 2: Attaching Loft Bed Panels (Ends)
Proceed by firmly attaching the loft bed panels to the assembled upper section, effectively creating the bed’s ends. Align the panels precisely with the side rails, ensuring they are flush and square. Utilize the designated bolts and washers, referencing the assembly diagrams for correct placement.
Begin by hand-tightening all fasteners, then progressively tighten them with the provided tool. Avoid over-tightening, which could damage the wood. Confirm the panels are securely fastened and contribute to the overall stability of the bed frame. This step defines the length and width of the sleeping area, so accuracy is paramount. Regularly inspect connections for tightness throughout the process.
Step 3: Connecting the Bed Frame

Now, connect the remaining bed frame components to the assembled upper section and end panels. Carefully align the side rails with the pre-drilled holes, ensuring a snug fit. Employ the appropriate bolts, washers, and any included locking mechanisms to secure the frame.
Hand-tighten all connections initially, then systematically tighten them with the provided tool, working in a diagonal pattern to distribute pressure evenly. Double-check that all corners are square and that the frame is level. A stable frame is crucial for safety and longevity. This stage establishes the foundational support for the mattress and sleeper.
Step 4: Installing the Ladder
With the bed frame securely connected, proceed to install the ladder. Locate the designated ladder attachment points on the bed frame – these are typically reinforced areas. Align the ladder rails with these points, ensuring proper orientation for safe climbing.
Use the provided bolts and washers to firmly attach the ladder, again tightening in a diagonal pattern. Verify the ladder is stable and doesn’t wobble. Confirm each step is securely fastened and provides a solid foothold. A properly installed ladder is vital for safe access to the upper bunk, especially for children.
Step 5: Securing the Safety Rails
Prioritize safety by meticulously securing the rails. Locate the pre-drilled holes along the upper bed perimeter. Align the safety rail posts with these holes, ensuring a flush fit against the bed frame. Utilize the provided bolts, washers, and potentially locking nuts for maximum stability.
Tighten all fasteners in a diagonal pattern to distribute pressure evenly. Regularly inspect the rails for looseness, especially after initial use. These rails are crucial for preventing falls during sleep or movement on the upper bunk, making a secure installation paramount for user safety.

Optional Accessories Assembly

Enhance your loft bed with additions like headboards, desks, or shelves; each component requires separate assembly, typically taking 15-60 minutes per item.
Assembling the Slatted Headboard
Begin by identifying all headboard components – typically including side supports, horizontal slats, and necessary hardware like screws or bolts. Carefully attach the side supports to the main headboard frame, ensuring proper alignment before fully tightening.
Next, evenly space and secure the wooden slats across the supports. These slats provide crucial support for pillows and bedding, so ensure they are firmly attached and won’t shift during use.
Double-check all connections for stability; a wobbly headboard can compromise safety and comfort. Finally, attach the completed headboard to the loft bed frame, following the specific instructions provided with your model. Proper attachment is vital for overall bed stability.

Attaching a Desk or Workspace
Start by positioning the desk frame beneath the loft bed, ensuring adequate clearance and accessibility. Identify the designated attachment points on both the bed frame and the desk structure. Typically, this involves brackets and bolts;
Carefully align the desk with the bed frame and begin securing it using the provided hardware; Ensure the desk is level and stable before fully tightening all bolts. A wobbly desk can be unsafe and frustrating.
Consider cable management solutions to keep cords organized and prevent tripping hazards. Finally, double-check all connections for strength and stability, confirming a secure and functional workspace beneath the loft bed.
Installing Shelves or Storage Units
Begin by determining the optimal location for shelves or storage, considering accessibility and weight distribution. Locate the pre-drilled holes or designated mounting points on the loft bed frame.
Attach mounting brackets securely to the bed frame using appropriate screws, ensuring they are level and aligned. Carefully position the shelves or storage units onto the brackets, verifying a snug and stable fit.
Secure the shelves or units to the brackets with additional screws or fasteners. Regularly inspect these connections to prevent shifting or detachment, prioritizing safety and maximizing storage space.
Troubleshooting Common Issues
Addressing missing parts, wobbly structures, or loose connections is crucial for a safe and stable loft bed; careful inspection and tightening are key.
Dealing with Missing Parts
Discovering missing components during loft bed assembly can be frustrating, but don’t halt progress immediately. First, meticulously re-check all packaging materials – sometimes smaller items are tucked away. Create a detailed list of the missing parts, including quantity and specific names (e.g., bolt type, panel number).
Next, consult the assembly instructions; often, a parts list with diagrams is included for verification. If the part is definitively missing, locate your purchase receipt and contact the retailer or manufacturer’s customer support.
Many companies offer replacement parts, often free of charge, especially if the issue arises shortly after purchase. Be prepared to provide your order details and a description of the missing item. Avoid using substitute parts that don’t meet the original specifications, as this could compromise the bed’s structural integrity and safety.
Addressing Wobbly Structures
A wobbly loft bed is a serious safety concern and requires immediate attention. Begin by systematically re-tightening all bolts and screws, starting with those connecting the main support beams and frame. Ensure each fastener is firmly secured, but avoid over-tightening, which can strip threads or damage the wood.
Next, carefully inspect all connections for proper alignment. Sometimes, a slight adjustment to a panel or leg can resolve the instability. If the wobble persists, check the floor surface; an uneven floor can contribute to the problem.
Consider using shims under the legs to level the bed. If the issue remains unresolved, contact the manufacturer or a qualified professional for assistance – a structurally unsound loft bed should not be used.
Tightening Loose Bolts and Screws
Regularly inspect all bolts and screws within the loft bed structure – this is crucial for maintaining stability and safety. Use the appropriate tools (typically an Allen wrench or screwdriver) to tighten any that have become loose. Don’t force them; ensure the tool fits correctly to avoid stripping the fastener head.
Pay close attention to connections between the bed frame, support beams, ladder, and safety rails. These areas experience the most stress. A good practice is to re-tighten all fasteners after the initial assembly and then periodically (every few months) thereafter.
If a screw spins freely and doesn’t tighten, the hole may be stripped. Consider using a slightly larger screw or wood glue with a toothpick to create a tighter fit.
Maintenance and Care
Consistent inspection of all components, coupled with routine cleaning, ensures the longevity and safety of your loft bed, preventing potential issues.

Regular Inspection of Components
Consistent and thorough inspection is paramount for maintaining loft bed safety and structural integrity. Regularly examine the bed frame, paying close attention to joints and connections, ensuring all bolts and screws remain tightly fastened. Check the ladder for stability, verifying each step is secure and undamaged. Inspect the safety rails frequently – these are crucial for preventing falls, so confirm their firm attachment and overall condition.
Furthermore, assess the slatted bed support system, looking for any signs of cracking or breakage. Don’t overlook the loft bed panels themselves; check for warping or stress fractures. A proactive approach to inspection, ideally monthly, can identify and address minor issues before they escalate into significant problems, guaranteeing a safe and reliable sleeping or workspace.
Cleaning Instructions
Maintaining a clean loft bed not only enhances its appearance but also contributes to a healthier sleep environment. For the bed frame, use a damp cloth with mild soap to wipe down all surfaces, avoiding abrasive cleaners that could damage the finish. Regularly vacuum around and under the bed to remove dust and debris, preventing allergen buildup.
The ladder and safety rails can be cleaned similarly, ensuring all steps and bars are free of grime. If the bed features fabric components, such as a headboard, spot clean with a fabric cleaner appropriate for the material. Avoid excessive moisture, and always ensure all cleaning solutions are fully dried before use. Routine cleaning, approximately every season, will preserve the loft bed’s condition.

Brand-Specific Instructions
Camaflexi and Dorel Living offer unique assembly manuals for models like the Concord and CALLUM, ensuring proper setup and safety for each brand’s design.
Camaflexi Loft Bed Assembly
Assembling your Camaflexi loft bed begins with carefully unpacking all components and verifying against the parts list. Prioritize the upper bed section, utilizing the provided loft bed panels as the foundational ends.
Securely attach these panels, ensuring proper alignment before fully tightening hardware. Next, connect the bed frame, paying close attention to the designated slots and connection points.
Installation of the ladder is crucial for safe access; confirm it’s firmly attached and stable. Finally, meticulously install the safety rails, adhering to all provided warnings and guidelines.
Remember, assembly typically takes around two hours for the basic structure, with additional time needed for optional accessories. Refer to the Camaflexi manual for model-specific details and diagrams.
Dorel Living Loft Bed Assembly
Begin your Dorel Living loft bed assembly by thoroughly reviewing the included instructions and identifying all parts. Start with assembling the upper bed section, utilizing the end panels for structural support.
Carefully connect the bed frame, ensuring all bolts and screws are properly aligned and tightened—avoid over-tightening. The ladder installation is a critical safety step; verify its secure attachment before use.
Prioritize the installation of safety rails, strictly following the provided warnings and guidelines to prevent falls.
Allow approximately two hours for the basic assembly, with extra time allocated for optional features like desks or shelves. Consult the Dorel Living manual for specific model instructions, like the CALLUM FULL Loft Bed.

Finding Replacement Instructions
Locate lost manuals online through brand websites or customer support; Dorel Living and Camaflexi offer digital copies for various loft bed models.
Locating Manuals Online
Many manufacturers provide downloadable assembly instructions directly on their official websites. Begin your search on the Camaflexi or Dorel Living sites, specifically looking for your bed model – Concord Full Size or CALLUM FULL, for example. A general online search using the bed’s brand and model number, combined with “assembly instructions” or “user manual,” often yields results.
Furthermore, explore online retailers where you purchased the loft bed; they sometimes host digital copies of the manuals. Websites specializing in furniture assembly guides may also have archived instructions. Remember to verify the manual’s compatibility with your specific loft bed model to ensure accurate guidance throughout the assembly process. Prioritize official sources for the most reliable information.
Contacting Customer Support
If online resources prove insufficient, reaching out to the manufacturer’s customer support is a valuable step. Camaflexi and Dorel Living typically offer support via phone, email, or online chat. Prepare your bed’s model number and purchase date for quicker assistance. Explain the specific issue you’re facing – missing parts, unclear instructions, or assembly difficulties.
Alternatively, contact the retailer where you bought the loft bed; they may offer support or connect you with the manufacturer. Keep records of all communication, including dates, times, and representative names. Be patient and clearly articulate your needs to ensure a helpful resolution to your assembly challenges.