Osgood-Schlatter Disease: A Comprehensive Exercise Guide
Effective rehabilitation exercises, including stretching of hamstrings, quads, and calves, are crucial for managing Osgood-Schlatter disease and preventing future occurrences.
Understanding Osgood-Schlatter Disease (OSD)
Osgood-Schlatter disease (OSD) is a prevalent cause of knee pain, particularly affecting active children and adolescents, with boys being more commonly impacted. This condition centers around inflammation of the patellar tendon, the large muscle tendon straightening the knee, at the tibial tuberosity – the bony bump below the kneecap where the tendon attaches.
OSD isn’t typically caused by a single injury, but rather from repetitive stress and overuse, especially during growth spurts and puberty. Increased tension and pressure on the growth plate, due to activities like running and jumping, contribute significantly to its development. It’s a childhood condition, resolving as growth slows. Symptoms manifest as localized pain, swelling, and tenderness directly below the kneecap on the shinbone. While not a serious long-term issue, OSD can be quite disruptive to an active lifestyle, necessitating appropriate management and rehabilitation, often involving specific exercises.
What Causes Osgood-Schlatter Disease?
Osgood-Schlatter disease arises from a combination of factors, primarily related to rapid growth and repetitive strain. During adolescence, bones grow quickly, but muscles and tendons may not keep pace. This imbalance creates increased tension on the patellar tendon, particularly at its attachment point on the tibial tuberosity.
Overuse and repetitive activities involving running, jumping, and forceful knee extension exacerbate this tension. Sports like basketball, volleyball, soccer, and gymnastics are frequently associated with OSD. The growth plate at the tibial tuberosity becomes inflamed due to this constant pulling and pressure. It’s important to note that OSD isn’t caused by a traumatic injury, but rather a chronic overloading of the growth center. While exercises aren’t the cause, improper training or lack of conditioning can contribute to the development of the condition. Puberty and growth spurts are key predisposing factors.
Symptoms of Osgood-Schlatter Disease
The hallmark symptom of Osgood-Schlatter disease is pain just below the kneecap, over the tibial tuberosity. This pain typically worsens with activity, particularly running, jumping, squatting, or climbing stairs. Initially, the pain may be mild and intermittent, but it can become more persistent and severe as the condition progresses.
Swelling and tenderness are often present over the tibial tuberosity, and a noticeable bump may develop. This bump is a result of inflammation and bone growth. Pain can disrupt daily activities and athletic participation. While not always present, some individuals experience pain even at rest. Symptoms are commonly observed in adolescents undergoing growth spurts, and often affect one or both knees. Although exercises aren’t the direct cause of symptoms, they can aggravate the existing condition. Seeking prompt evaluation is crucial for appropriate management.

Phase 1: Initial Management & Pain Reduction
Prioritize rest, activity modification, and consistent ice application to reduce inflammation and alleviate pain—essential first steps in managing Osgood-Schlatter disease.
Rest and Activity Modification
Initial management of Osgood-Schlatter disease heavily relies on reducing stress on the affected knee. This doesn’t necessarily mean complete immobilization, but a significant modification of activities is crucial. High-impact exercises like running, jumping, and repetitive knee bending should be temporarily limited or avoided altogether.
The goal is to decrease the tension on the patellar tendon and allow the tibial tuberosity to heal. Adjusting activity levels means finding alternatives that don’t exacerbate the pain. For young athletes, this might involve switching to low-impact sports like swimming or cycling.
Carefully monitor pain levels during and after activity; any increase signals a need for further reduction in intensity or duration. Listen to your body and avoid “pushing through” the pain, as this can worsen the condition and prolong recovery. Gradual return to previous activity levels is key, guided by symptom response.
Ice Application Protocol
Applying ice is a cornerstone of initial Osgood-Schlatter disease management, effectively reducing pain and inflammation around the tibial tuberosity. It’s most beneficial immediately following activity or when experiencing acute pain flare-ups. Always use a protective barrier, such as a thin towel, between the ice pack and the skin to prevent frostbite.
The recommended protocol involves applying ice for 15-20 minutes at a time, several times a day – typically every 2-3 hours during the acute phase. Ensure the ice pack covers the entire affected area, extending slightly beyond the point of tenderness;
Monitor the skin for excessive redness or numbness. Consistent ice application helps control inflammation, providing symptomatic relief and facilitating a quicker return to activity. Combining ice with rest and activity modification maximizes its effectiveness in managing Osgood-Schlatter symptoms.
Over-the-Counter Pain Relief Options
For managing the discomfort associated with Osgood-Schlatter disease, several over-the-counter (OTC) pain relief options can provide symptomatic relief. Nonsteroidal anti-inflammatory drugs (NSAIDs), such as ibuprofen or naproxen, are commonly recommended to reduce both pain and inflammation at the tibial tuberosity.
Acetaminophen (paracetamol) can also be used for pain relief, though it doesn’t address the underlying inflammation. Always adhere to the recommended dosage instructions on the medication packaging and consult with a healthcare professional if you have any underlying medical conditions or are taking other medications.
These OTC options, combined with rest, ice, and appropriate exercise modifications, can effectively manage symptoms. However, they are intended for temporary relief and should not replace a comprehensive rehabilitation program focused on strengthening and flexibility.

Phase 2: Range of Motion & Flexibility Exercises
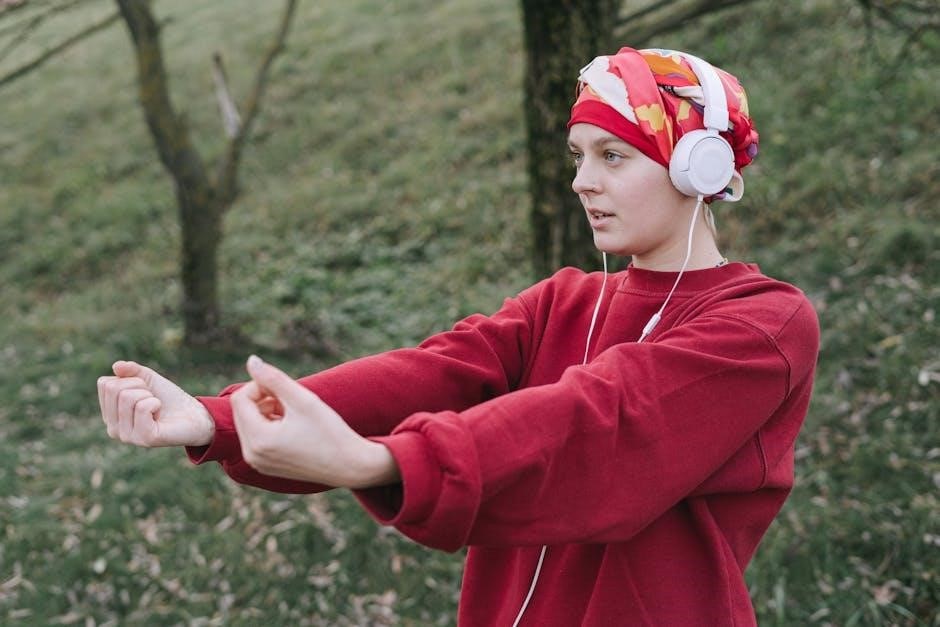
Gentle stretching of the hamstrings, quadriceps, and calf muscles is vital to restore flexibility and reduce tension around the knee joint during recovery.
Hamstring Stretching Techniques
Hamstring flexibility is paramount in managing Osgood-Schlatter disease, as tight hamstrings exacerbate stress on the patellar tendon. Begin with a lying hamstring stretch: lie supine with one leg extended and the other bent, foot flat on the floor. Gently pull the extended leg towards your chest, keeping the knee slightly bent initially. Hold for 20-30 seconds, feeling a stretch along the back of the thigh.
Another effective technique is the seated hamstring stretch. Sit with legs extended, reach towards your toes, maintaining a straight back as much as possible. Avoid bouncing; focus on a sustained stretch. A towel stretch can also be beneficial – loop a towel around the foot of the extended leg and gently pull back.
Remember to perform these stretches slowly and controlled, avoiding any sharp pain. Consistent, gentle stretching is more effective than aggressive attempts to force flexibility. Aim for 2-3 repetitions of each stretch, several times daily.
Quadriceps Stretching Exercises

Quadriceps flexibility is vital for reducing tension on the patellar tendon in individuals with Osgood-Schlatter disease. A common and effective stretch is the standing quadriceps stretch. Stand tall, bend one knee, and grasp your foot or ankle, gently pulling your heel towards your buttock. Keep your thighs aligned and avoid arching your back. Hold for 20-30 seconds, feeling the stretch in the front of your thigh.
The lying quadriceps stretch is another useful option. Lie on your side, bend the top knee, and grasp your foot, pulling it towards your buttock. Maintain a neutral spine and avoid twisting. A wall quadriceps stretch can also be performed by leaning against a wall with one knee bent and gently pressing your heel towards your glutes.
Perform these stretches slowly and consistently, avoiding any bouncing or sharp pain. Repeat 2-3 times, several times a day, to improve flexibility and reduce discomfort.
Calf Muscle Stretching Routine
Tight calf muscles can exacerbate Osgood-Schlatter symptoms by increasing stress on the knee joint. A consistent calf stretching routine is therefore essential. Begin with the gastrocnemius stretch: stand facing a wall, place one foot slightly behind the other, keeping both heels on the ground. Lean forward, bending your front knee until you feel a stretch in your upper calf. Hold for 20-30 seconds.
Next, perform the soleus stretch. This targets the lower calf muscle. Repeat the previous position, but this time, slightly bend your back knee as well. This isolates the soleus. Another effective stretch is the towel stretch – sit with legs extended, loop a towel around your toes, and gently pull back, keeping your knee straight.
Repeat each stretch 2-3 times, multiple times daily, focusing on a gentle, sustained stretch without bouncing.
Patellar Tendon Stretches
Gentle stretching of the patellar tendon can help improve flexibility and reduce tension, contributing to symptom relief in Osgood-Schlatter disease. However, these stretches should be performed cautiously and without causing pain. A simple, yet effective stretch involves kneeling with one leg forward, foot flat on the floor, and the other leg back. Gently lean forward, keeping your back straight, until you feel a mild stretch behind the knee of the extended leg.
Hold this position for 20-30 seconds, repeating 2-3 times. Another variation is the quad stretch while standing, gently pulling your heel towards your glutes. Avoid overextending the knee. Remember, the goal isn’t to aggressively stretch, but to gently improve tendon mobility.
Prioritize pain-free movement and stop immediately if you experience any discomfort.
Phase 3: Strengthening Exercises
Progressive strengthening of quadriceps, hamstrings, and gluteal muscles is vital for supporting the knee joint and reducing stress on the tibial tuberosity.
Quadriceps Strengthening Exercises
Strengthening the quadriceps muscles is paramount in managing Osgood-Schlatter disease, as they play a crucial role in knee stabilization and shock absorption. Weak quads contribute to increased stress on the patellar tendon and tibial tuberosity. Begin with Straight Leg Raises: Lie flat on your back with one leg bent and the other extended. Slowly lift the extended leg, keeping it straight, and hold for a few seconds before lowering. Repeat 10-15 times per leg.
Next, incorporate Wall Sits. Stand with your back against a wall, feet shoulder-width apart, and slowly slide down until your thighs are parallel to the floor, maintaining a 90-degree angle at the knees. Hold this position for 20-30 seconds, gradually increasing the duration as strength improves. Perform 3-5 repetitions. These exercises should be performed pain-free, and proper form is essential to avoid exacerbating the condition. Focus on controlled movements and avoid pushing through pain.
Straight Leg Raises
Straight Leg Raises are a foundational exercise for rebuilding quadriceps strength without placing excessive stress on the tibial tuberosity, making them ideal during the initial phases of Osgood-Schlatter rehabilitation. To perform this exercise, lie flat on your back with one leg bent at the knee, foot flat on the floor, and the other leg extended straight.
Slowly lift the extended leg approximately 6-12 inches off the ground, maintaining a straight knee and engaging your quadriceps muscles. Hold this contracted position for 3-5 seconds, focusing on controlled muscle activation. Gradually lower the leg back to the starting position. Repeat this movement for 10-15 repetitions on each leg, completing 2-3 sets.
Ensure your core remains engaged throughout the exercise to maintain proper spinal alignment and prevent lower back strain. If you experience any pain, immediately stop and consult with a healthcare professional.
Wall Sits
Wall Sits are an excellent isometric exercise to strengthen the quadriceps muscles, crucial for supporting the knee joint and reducing stress on the patellar tendon in individuals with Osgood-Schlatter disease. Begin by standing with your back flat against a wall, feet shoulder-width apart, and approximately 12-18 inches away from the wall.
Slowly slide down the wall, bending your knees to a 45-90 degree angle, ensuring your thighs are parallel to the floor. Maintain this position, holding for 20-30 seconds, actively engaging your quadriceps and core muscles. Avoid letting your knees extend beyond your toes.
Repeat this exercise for 3-5 sets, with short rest periods between each set. If you experience any pain around the knee, reduce the depth of the squat or discontinue the exercise. Proper form is essential to maximize effectiveness and prevent injury.

Hamstring Strengthening Exercises
Strengthening the hamstrings is vital in balancing the forces around the knee, counteracting the pull of the quadriceps and reducing stress on the tibial tuberosity in Osgood-Schlatter disease. Weak hamstrings can contribute to imbalances that exacerbate the condition. A simple yet effective exercise is the hamstring curl using a resistance band.
Secure a resistance band around your ankles and lie face down. Slowly bend one knee, bringing your heel towards your glutes, resisting the band’s pull. Maintain a controlled movement throughout the exercise.
Perform 3 sets of 10-15 repetitions on each leg. Gradually increase the resistance of the band as your strength improves. Focus on proper form to avoid injury and maximize the benefits of this exercise. Consistent hamstring strengthening is key to long-term recovery.
Hamstring Curls (with resistance band)
Hamstring curls with a resistance band are a foundational exercise for rebuilding strength and stability in the knee joint during Osgood-Schlatter recovery. This exercise specifically targets the hamstring muscles, which play a crucial role in controlling knee flexion and reducing stress on the patellar tendon.
To perform, securely anchor a resistance band to a stable object. Loop the other end around your ankle. Lie face down with a slight bend in your knee. Slowly curl your heel towards your buttocks, resisting the band’s pull.
Complete 3 sets of 12-15 repetitions per leg, focusing on controlled movements. Increase band resistance as strength improves. Proper form is paramount; avoid swinging or using momentum. This exercise aids in restoring balanced muscle function around the knee.
Gluteal Muscle Strengthening
Strengthening the gluteal muscles – encompassing the gluteus maximus, medius, and minimus – is vital in Osgood-Schlatter rehabilitation. These muscles contribute significantly to hip extension, external rotation, and pelvic stability, indirectly reducing stress on the knee joint. Weak glutes can lead to altered biomechanics, exacerbating OSD symptoms.
Strong glutes help control lower limb movement, preventing excessive strain on the patellar tendon. Incorporating glute-focused exercises into your routine improves overall lower body function and supports proper alignment. This contributes to a more efficient and pain-free movement pattern.
Focus on exercises like glute bridges, hip abduction with resistance bands, and single-leg deadlifts. Aim for 3 sets of 12-15 repetitions, prioritizing controlled movements and proper form to maximize effectiveness and minimize risk of re-injury.
Glute Bridges
Glute bridges are a foundational exercise for strengthening the gluteal muscles, crucial in Osgood-Schlatter rehabilitation. This exercise effectively targets the gluteus maximus, contributing to improved hip extension and pelvic stability, which indirectly reduces stress on the knee. Performing glute bridges correctly involves lying on your back with knees bent and feet flat on the floor.
Engage your core and squeeze your glutes as you lift your hips off the ground, creating a straight line from your shoulders to your knees. Hold this position for a few seconds, then slowly lower back down. To increase the challenge, consider adding a resistance band around your thighs or performing single-leg glute bridges.
Aim for 3 sets of 12-15 repetitions, focusing on controlled movements and maintaining proper form throughout the exercise. This will help build strength and endurance in your glutes, supporting knee health and function.
Phase 4: Proprioceptive & Functional Exercises
Proprioceptive drills and agility work enhance knee stability, crucial for returning to activity safely after Osgood-Schlatter disease recovery and rehabilitation.
Single Leg Balance Exercises
Single leg balance exercises are fundamental for restoring proprioception – your body’s awareness of its position in space – which is often compromised during and after Osgood-Schlatter disease. Begin by simply standing on the affected leg for 30 seconds, gradually increasing the duration as strength improves. To progress, try closing your eyes, adding a slight knee bend, or performing the exercise on an unstable surface like a foam pad or pillow.
These variations challenge your balance further, strengthening the muscles surrounding the knee and improving stability. Incorporate gentle movements while balancing, such as reaching in different directions with your free leg, to mimic functional activities. Focus on maintaining good form – a straight back, engaged core, and controlled movements. Aim for three sets of 10-15 repetitions on each leg, ensuring proper technique throughout. Remember to start slowly and listen to your body, stopping if you experience any pain.
Agility Drills for Knee Stability
Agility drills are crucial for rebuilding dynamic knee stability and preparing for a return to sports after Osgood-Schlatter disease. Start with simple cone drills, such as shuffling side-to-side between cones, focusing on quick, controlled movements. Progress to figure-eight runs, emphasizing changes in direction without excessive knee valgus (inward collapse).
Ladder drills are also beneficial, improving footwork and coordination. Incorporate hopping and jumping drills, starting with two-foot hops and gradually progressing to single-leg hops. Ensure a soft landing with each jump, absorbing the impact through your leg muscles. These drills enhance neuromuscular control, strengthening the muscles responsible for stabilizing the knee joint. Perform 2-3 sets of each drill, with 10-15 repetitions, prioritizing proper form over speed. Always warm up thoroughly before and cool down afterward.
Low-Impact Cardio for Gradual Return to Activity
Low-impact cardiovascular exercise is essential for regaining fitness without exacerbating Osgood-Schlatter symptoms. Begin with activities like stationary cycling, focusing on a comfortable resistance and cadence. Swimming and water aerobics are excellent choices, as the buoyancy reduces stress on the knee joint. Elliptical trainers provide a similar low-impact workout, mimicking running motion without the jarring impact.
Gradually increase the duration and intensity of these activities as tolerated. Avoid activities involving repetitive jumping or sudden changes in direction initially. Monitor your pain levels closely; any increase in pain signals the need to reduce intensity or modify the exercise. Aim for 20-30 minutes of low-impact cardio 3-5 times per week. This phase focuses on improving cardiovascular health and building endurance, preparing the knee for more demanding activities.

Long-Term Management & Prevention
Consistent warm-up routines and post-activity stretching of thigh, hamstring, and calf muscles are vital for preventing Osgood-Schlatter disease recurrence and maintaining knee health.
Importance of Proper Warm-up
Prior to any physical activity, a thorough warm-up is absolutely essential for individuals susceptible to, or recovering from, Osgood-Schlatter disease. A dynamic warm-up prepares the muscles and tendons around the knee for the stresses of exercise, increasing flexibility and blood flow.
Begin with light cardio, such as jogging in place or jumping jacks, for five to ten minutes. This elevates the heart rate and prepares the muscles. Following cardio, incorporate dynamic stretches like leg swings (forward, backward, and sideways), arm circles, and torso twists.
Specifically target the quadriceps, hamstrings, and calf muscles with dynamic stretches. These stretches should mimic the movements of the activity you’re about to perform. A proper warm-up reduces the risk of overloading the patellar tendon and exacerbating symptoms, promoting long-term knee health and preventing re-injury.
Cool-down and Stretching Post-Activity
Following any physical activity, a dedicated cool-down period is vital for managing Osgood-Schlatter disease and promoting recovery. A cool-down gradually lowers your heart rate and helps prevent muscle soreness. Begin with five to ten minutes of light cardio, such as walking, to allow your body to transition.
Subsequently, focus on static stretching, holding each stretch for 20-30 seconds. Prioritize stretching the quadriceps, hamstrings, and calf muscles, as these muscle groups directly impact the patellar tendon. Gentle stretches, avoiding bouncing, are key to improving flexibility and reducing muscle tension.
Consistent post-activity stretching helps maintain a healthy range of motion in the knee joint and minimizes the risk of future inflammation. This routine supports the healing process and contributes to long-term knee health, preventing symptom recurrence.
Gradual Return to Sport Guidelines
Returning to sports after Osgood-Schlatter disease requires a carefully planned, gradual approach to prevent re-injury. Avoid rushing back to full activity levels; instead, follow a phased progression. Begin with low-impact exercises, gradually increasing intensity and duration over weeks, not days.
Initially, focus on activities that don’t aggravate your symptoms, like swimming or cycling. As pain subsides, introduce light jogging and sport-specific drills at reduced intensity. Monitor your knee for any signs of discomfort – pain, swelling, or stiffness – and adjust your activity accordingly.
Ensure you’ve regained full range of motion and strength before resuming competitive play. Proper warm-up and cool-down routines are essential. Listen to your body, and don’t hesitate to consult with a healthcare professional to guide your return to sport safely.
When to Seek Professional Help
Although many cases of Osgood-Schlatter disease improve with conservative management, seeking professional help is crucial in certain situations. Consult a doctor or physical therapist if pain is severe, persistent, or interferes significantly with daily activities.
If home treatment, including rest, ice, and over-the-counter pain relief, doesn’t provide adequate relief after several weeks, professional evaluation is necessary. Additionally, seek help if you notice any signs of infection, such as increased redness, warmth, or fever.
A healthcare professional can accurately diagnose the condition, rule out other potential causes of knee pain, and develop a tailored treatment plan, including specific exercises and rehabilitation strategies. They can also advise on appropriate return-to-sport timelines and prevent long-term complications.