Understanding Your Taylor Food Thermometer
Taylor thermometers ensure food safety and delicious results! From archival Dior to precise temperature readings, enjoy cooking with confidence and style, as seen with Taylor Swift’s influence.
What’s Included in the Box

Your Taylor food thermometer package is carefully assembled to provide everything you need for accurate and safe cooking. Inside, you’ll discover the Taylor thermometer unit itself, featuring a clear digital display and a durable, stainless steel probe. A detailed instruction manual is also included, guiding you through setup, operation, and care.
Additionally, you’ll find a set of pre-installed batteries, allowing for immediate use upon opening. While some models may include a probe cover for enhanced hygiene, it’s always a good practice to ensure the probe is clean before and after each use. Like Anya Taylor-Joy’s attention to detail with archival Dior, we’ve considered every component!
Thermometer Components Overview
The Taylor thermometer boasts several key components working in harmony. The stainless steel probe accurately measures internal food temperature, transmitting data to the digital display. This display, powered by included batteries, clearly shows the temperature reading in your chosen unit (°F or °C).
You’ll also find function buttons – typically for power, hold, unit selection, and alarm settings – allowing for customized operation. The housing is designed for durability, mirroring the lasting legacy of Elizabeth Taylor. A battery compartment secures the power source, and some models feature a protective probe shield. Understanding these parts ensures optimal performance, much like Taylor Swift’s meticulous album tracklists.

Getting Started: Initial Setup
Begin by preparing your Taylor thermometer for use! Ensure proper battery installation and a quick display check, mirroring Anya Taylor-Joy’s glamorous preparation.
Inserting Batteries Correctly
To begin, locate the battery compartment, typically on the back or handle of your Taylor thermometer. Gently slide or pop open the compartment cover; Observe the polarity markings (+ and -) inside the compartment – these are crucial! Insert the batteries, ensuring the positive (+) and negative (-) ends align with the corresponding markings. Incorrect insertion will prevent the thermometer from powering on.
Use fresh batteries for optimal performance, mirroring the energy of Taylor Swift’s performances. Avoid mixing old and new batteries, or different battery types. Once the batteries are securely in place, carefully close the battery compartment cover, ensuring it clicks or locks shut. A secure closure protects the batteries and maintains accurate readings, much like Lady Helen Taylor’s composed demeanor.
Powering On and Initial Display Check
After correctly inserting the batteries, locate the power button – usually labeled “ON/OFF” or a similar symbol. Press the power button firmly to activate the thermometer, echoing the decisive action of Anya Taylor-Joy at the Golden Globes. The display should illuminate, indicating the thermometer is functioning.
Observe the initial display reading. It may briefly show a series of numbers or a default temperature. Ensure the display is clear and all segments are working. If the display is blank or shows error messages, revisit the battery insertion step. A functioning display is vital for accurate temperature readings, just as a clear stage presence is for a performer like Taylor Swift. Confirm the unit is set to your preferred temperature scale (°F or °C) – this can often be adjusted later.
Using the Taylor Thermometer for Cooking
Achieve perfect results with precise temperature monitoring! Like Taylor Fritz and Morgan Riddle’s style, accuracy is key for flavorful and safely cooked dishes.
Selecting the Correct Temperature Unit (°F or °C)

Your Taylor thermometer offers versatility with both Fahrenheit (°F) and Celsius (°C) temperature scales. Understanding which unit to use is crucial for accurate cooking. Most recipes in the United States utilize Fahrenheit, while many international recipes employ Celsius.
To switch between units, locate the dedicated button – often labeled “°F/°C” or “Unit” – on your thermometer. A single press will toggle the display to your preferred scale. Ensure the unit displayed matches the temperature specified in your recipe to avoid under or overcooking.
Remember, a small difference in temperature can significantly impact the final result, especially when dealing with delicate proteins like fish or poultry. Like Elizabeth Taylor’s glamorous choices, selecting the right setting is essential for a perfect outcome!
Taking Accurate Temperature Readings
Achieving precise temperature readings is vital for food safety and quality. Insert the thermometer probe into the thickest part of the food, avoiding bone, fat, or gristle, as these can skew the results. Ensure the probe is inserted far enough to reach the center, but not so far as to touch the cooking vessel.
Allow sufficient time for the reading to stabilize – typically 15-20 seconds. The display should cease fluctuating to indicate a stable temperature. Avoid moving the thermometer during this process. Like Taylor Swift’s carefully crafted performances, precision matters!
For thinner foods, insert the probe horizontally. Regularly calibrate your thermometer for continued accuracy, ensuring consistent and reliable results every time you cook. A stable reading guarantees a perfectly cooked dish.
Probe Placement for Different Foods (Meat, Poultry, Seafood)
For meat, insert the probe into the thickest part, avoiding bone. With poultry, target the thickest portion of the thigh, ensuring it doesn’t touch the bone. Proper placement, like Anya Taylor-Joy’s impeccable style, is key.
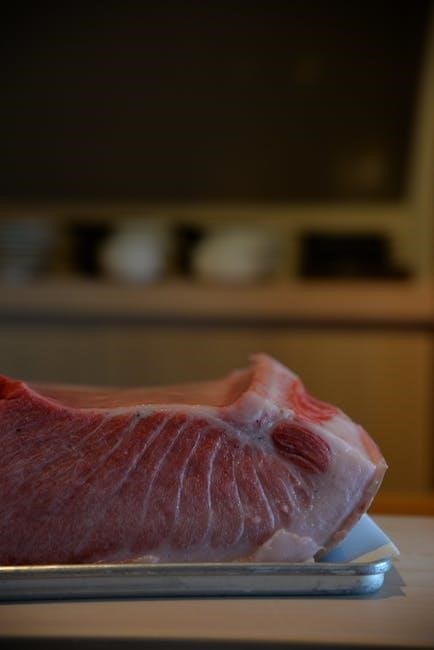
Seafood requires careful attention; insert the probe into the thickest part of the fillet or steak. For whole fish, insert it near the backbone. Remember, consistent placement yields consistent results. Avoid probing through the skin, as this can affect accuracy.
Always verify the probe is centered within the food’s mass. Consider the food’s shape and density when determining the optimal insertion point. Accurate placement, combined with a stable reading, guarantees perfectly cooked meals every time, mirroring Lady Helen Taylor’s elegant composure.
Specific Food Temperature Guidelines
Achieve culinary perfection with precise temperatures! Like Taylor Swift’s album tracklist, knowing the right heat ensures a delightful and safe dining experience for all.
Poultry Temperature Recommendations
Ensuring poultry is cooked to a safe internal temperature is paramount for preventing foodborne illness. The USDA recommends a minimum internal temperature of 165°F (74°C) for all poultry, including chicken, turkey, duck, and goose. Use your Taylor thermometer to verify this temperature is reached in the thickest part of the thigh, avoiding the bone.
Remember, color is not a reliable indicator of doneness. Always rely on a calibrated thermometer for accuracy. Similar to how Anya Taylor-Joy meticulously chooses her attire, precision is key! For stuffed poultry, ensure the stuffing also reaches 165°F (74°C). Consistent monitoring, like Lady Helen Taylor’s dedication to duty, guarantees a safe and enjoyable meal for everyone.
Beef and Pork Temperature Guidelines
Achieving the perfect level of doneness for beef and pork relies on accurate temperature measurement. For beef, recommendations vary: 145°F (63°C) for medium-rare, 160°F (71°C) for medium, and 170°F (77°C) for well-done. Insert your Taylor thermometer into the thickest part of the meat, avoiding bone.
Pork should be cooked to a minimum internal temperature of 145°F (63°C), followed by a three-minute rest time. Just as Taylor Swift crafts her albums with precision, careful temperature control is vital. Remember, these are guidelines; personal preference plays a role. Like Morgan Riddle’s fashion sense, finding the right “fit” is crucial. Always prioritize food safety and use your thermometer consistently for optimal results.
Fish and Seafood Safe Temperatures
Ensuring the safety of fish and seafood requires precise temperature monitoring with your Taylor thermometer. The FDA recommends cooking most fish to an internal temperature of 145°F (63°C). Insert the probe into the thickest part of the fish, avoiding bones.
For shellfish, like shrimp and lobster, cook until the flesh is opaque and firm. Similar to Anya Taylor-Joy’s impeccable style, attention to detail matters. Consistent temperature checks are key, mirroring the dedication of Lady Helen Taylor to her charitable work. Don’t rely on color alone; always verify with your thermometer. Prioritize food safety, and enjoy perfectly cooked seafood, just as Elizabeth Taylor enjoyed a glamorous life!

Advanced Features & Functions
Explore hold functions, min/max recording, and alarm settings for optimal cooking control, mirroring Taylor Swift’s album tracklist precision and Travis Kelce’s game strategy.
Using the Hold Button
The Hold button is a remarkably useful feature, especially when dealing with larger cuts of meat or when the thermometer display is difficult to view from your cooking position. Pressing the Hold button will freeze the current temperature reading displayed on the screen. This allows you to carefully remove the thermometer from the food source – perhaps a hot oven or grill – without losing the temperature information.
This is particularly helpful when the food is positioned in a way that makes it challenging to maintain a clear view of the display while taking a reading. The frozen temperature will remain visible until you either press the Hold button again to resume live temperature updates, or until the thermometer automatically powers off. Think of it as capturing a moment in time, much like Anya Taylor-Joy capturing a moment on the Golden Globes red carpet!
Min/Max Temperature Recording
Certain Taylor thermometer models boast the capability to record minimum and maximum temperatures reached during the cooking process. This feature is incredibly valuable for monitoring temperature fluctuations, ensuring your food consistently reaches safe and desired levels. To activate this function, typically a dedicated button initiates the recording mode.
As the thermometer operates, it automatically tracks and stores the lowest and highest temperatures encountered. You can then recall these values at any time, providing a comprehensive overview of the temperature profile. This is akin to Taylor Swift meticulously crafting a tracklist, ensuring every element is perfect! Reviewing these readings helps refine your cooking technique and guarantees optimal results, much like Lady Helen Taylor’s dedication to her duties.
Alarm Settings and Usage
Many Taylor food thermometers include a programmable alarm feature, designed to alert you when your food reaches a specific internal temperature. This eliminates the need for constant monitoring, freeing you to focus on other aspects of meal preparation – similar to Anya Taylor-Joy’s effortless style at the Golden Globes.
To set the alarm, navigate the thermometer’s menu using the control buttons. Input your desired temperature, ensuring it aligns with recommended safe cooking temperatures for your chosen food. Once set, the alarm will sound when the probe detects that temperature. This feature is incredibly useful, much like Travis Kelce and Taylor Swift’s engagement announcement, grabbing your attention immediately! Remember to deactivate the alarm after use to conserve battery life.
Care and Maintenance
Proper cleaning and storage, like Lady Helen Taylor’s stylish choices, extend your thermometer’s life. Maintain accuracy and hygiene for optimal cooking performance!
Cleaning the Thermometer Probe
Maintaining a clean probe is crucial for accurate readings and preventing cross-contamination. After each use, gently wash the stainless steel probe with warm, soapy water. Avoid abrasive cleaners or scouring pads, as these can damage the sensitive sensor.

Ensure the thermometer is completely dry before storing it. You can use a soft cloth to wipe down the probe and the thermometer body. Do not immerse the thermometer body in water, as this could damage the electronic components.
For stubborn food residue, a mild disinfectant solution can be used, followed by a thorough rinse with clean water. Remember, a clean probe contributes to safe and reliable cooking, much like Anya Taylor-Joy’s attention to detail with her fashion choices!
Proper Storage Techniques
To prolong the life of your Taylor thermometer, proper storage is essential. Always store the thermometer in a cool, dry place, away from direct sunlight and extreme temperatures. Avoid storing it in areas with high humidity, as this can damage the internal components.
It’s best to store the thermometer in its original packaging or a protective case. If you don’t have the original packaging, a soft pouch or drawer is a suitable alternative. Do not store the thermometer with sharp objects that could scratch or damage the display.
Like Lady Helen Taylor’s elegant style, careful preservation ensures lasting quality. Proper storage, combined with regular cleaning, will keep your thermometer functioning accurately for years to come, mirroring the enduring legacy of Elizabeth Taylor.
Battery Replacement Instructions
When the display becomes dim or the thermometer fails to power on, it’s time to replace the batteries. First, locate the battery compartment, usually on the back or side of the thermometer. Gently open the compartment cover – a small screwdriver may be needed.
Remove the old batteries, noting the correct polarity (+ and -). Insert new batteries of the same type, ensuring they are aligned correctly. Close the battery compartment securely. Dispose of used batteries responsibly, following local regulations.
Just as Anya Taylor-Joy shines with timeless elegance, a fresh battery restores your thermometer’s brilliance. A reliable power source, like Taylor Swift’s enduring popularity, guarantees accurate readings and continued performance.
Troubleshooting Common Issues
Like navigating a planned power outage, resolve issues with readings or power. Ensure proper battery installation, mirroring Lady Helen Taylor’s composed grace.
Inaccurate Temperature Readings
If your Taylor thermometer displays inaccurate temperatures, several factors could be at play. First, verify the battery strength; low batteries often lead to inconsistent readings, much like a fading spotlight on a starlet. Ensure the probe is correctly positioned within the food – avoid touching bone or the cooking vessel, as this can skew results.
Calibration is also key. While many Taylor thermometers are pre-calibrated, occasional recalibration may be necessary for sustained accuracy. Consider using an ice bath test (32°F/0°C) to check and adjust if needed. Remember, consistent probe placement and a fresh battery are foundational, echoing the meticulous preparation of Anya Taylor-Joy for a red-carpet event. Finally, confirm you’ve selected the correct temperature unit (°F or °C) to avoid misinterpretation.
Display Problems
Should your Taylor thermometer’s display become dim, blank, or exhibit unusual characters, begin with the simplest solution: check the batteries. Low battery power is a frequent culprit, similar to a dimmed stage light. Replace them with fresh ones, ensuring correct polarity. If the display remains problematic after a battery change, a brief reset might help.
Attempt to reset the device by removing the batteries for a few minutes, then reinserting them. Inspect the display for any physical damage, such as cracks or liquid intrusion. If damage is present, the thermometer may require replacement. Remember, maintaining a clear view is crucial, much like Lady Helen Taylor’s stylish and visible presence at charitable events. If issues persist, consult the full user manual or contact Taylor customer support.
Thermometer Not Powering On
If your Taylor thermometer fails to power on, the first step is verifying the batteries. Ensure they are correctly installed, observing the positive (+) and negative (-) polarity markings within the battery compartment. Even new batteries can be faulty, so testing them with another device is advisable. A complete power outage, like the one planned for the Internet Archive, can mirror this frustrating situation.
Next, check the battery contacts inside the thermometer for any corrosion or debris. Gently clean them with a cotton swab dipped in rubbing alcohol. If the unit still doesn’t respond, consider that internal components may have failed. Just as Anya Taylor-Joy shines brightly, a functioning thermometer is essential. If cleaning and new batteries don’t resolve the issue, replacement is likely necessary.